January 31, 1:30 PM Model Trains
I have begun to think seriously about making a mountain out of a molehill. I have changed the base of the refinery at Distillery Row and moved it a bit to make more room for the mountain. I am experimenting with using some plastic potting containers as a possible base for the mountain but will play with this a bit more before making a decision.
I then ran the operations for 1:00 PM for Session 2. This involved 4 different trains, but no switching. I particularly enjoy the sound effects when the steam locomotive is pulling the unit coal train.
January 29, 2:00 PM Model Trains
It took about an hour this morning to correct the three problems that I had noticed yesterday. All three were variations on the same theme - a minor problem with the track bed that caused a temporary short when a locomotive ran over it.
I then completed running three trains for the 12:00 PM schedule for Session 2.
Train #101, the passenger train, completed 4 circuits of the outer mainline at a high speed before pulling into the Valemount siding. It is fun to watch this train high-balling around the layout.
Here is a photo to Train #100 as it is about to pull out of the siding and enter the mainline track:
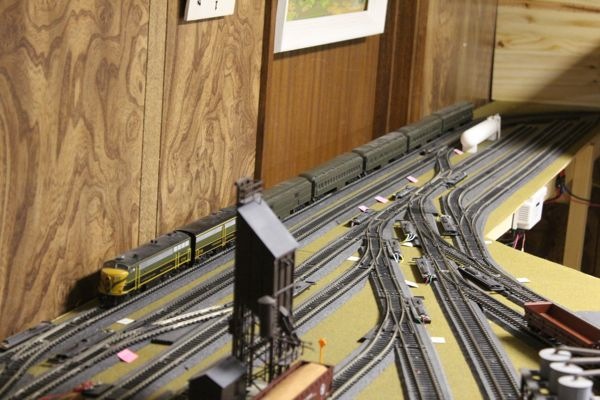
Then Train #401 completed two loops of the outer mainline before entering the Coaldale siding.
Finally Train #600 completed a mainline route before finally stopping at the Black Diamond siding where it dropped off an empty Australian Iron & Steel hopper car at Mercoal Mines.
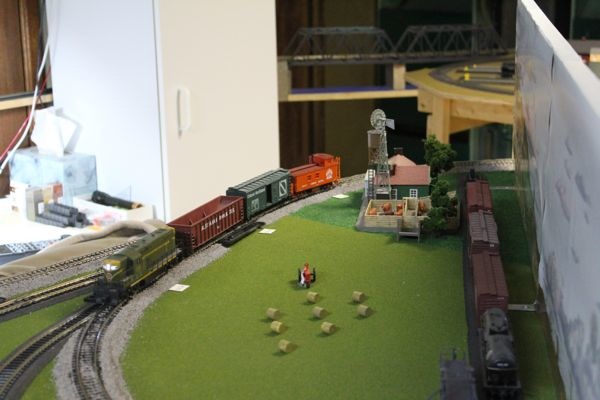
Here is a photo of Train #600 entering the inner mainline reversing loop on its way to Black Diamond siding.
January 28, 8:00 PM Model Trains
The trains are running again! I have just completed the operations for 11:00 am of Session 2.
This involved forming the consist for Train #401, a through freight train, that then left Coaldale heading west to Distillery Row. After two outer mainline loops, passing Train #101 on Valemount siding, the train pulled into Coaldale siding where it will wait for Train #600.
The consist for Train #600, a local freight, was formed in Jasper, and then left Jasper heading east to Coaldale. While completing two outer mainline loops it passed Train #401 on Coaldale siding and Train #101 on Valemount siding.
Three minor problems, at least I hope they are minor problems, were noticed during this session. There is a quick short behind Distillery Row, there is a loss of power in a section of track in the Coaldale yard, and the locomotive derails inside the new tunnel while travelling from the outer mainline to the inner mainline.
Not withstanding these annoyances, it was a real delight to get back into operational running. Keeping track of the various switch settings keeps me on my toes. And I love the logic in forming the consist for a train before it heads out onto the mainline.
January 28, 1:00 PM Model Trains
I have spent the morning in the train room. I have tested all of the mainline track and the trains are running smoothly. I have decided to stop ballasting as I have the sections finished that make a difference to the appearance. I then played around with an idea to place a small tunnel on the layout. I now have the understructure complete, but will need to do a little reading on building scenery before I continue.
It has been a very satisfying few days. I have learned how to apply ballast and how to build a superelevated curve. I even learned what the term superelevated means.
Now to continue assembling the viaduct. And to get back to running some operational trains.
January 27, 7:30 PM Model Trains
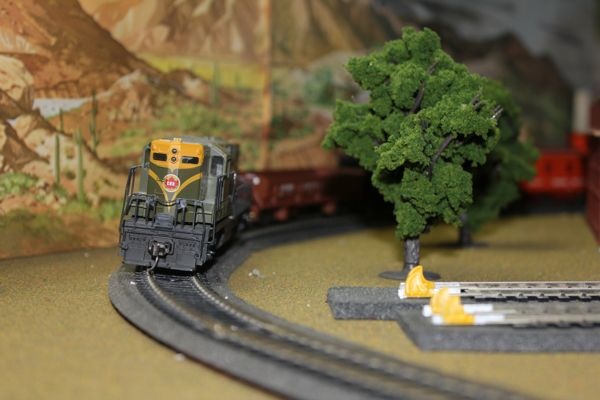
Much of today has been spent laying ballast on my inner mainline track. Both the Inner Mainline and the Inner Reversing Loop are now ballasted. I have also superelevated all of the curves for the inner mainline. It took almost 2 hours to get one of the curves working properly (i.e. a locomotive to go around the bend without derailing). This turns out to be very tricky as the difference in the elevation between a spot where it derails and where it then doesn't seems to be less than 1/8 ".
Here is a photo of CN 1720 rounding the superelevated curve on the inner mainline. This was taken before the ballast was added. You can see how the track bed has been raised on the outer side by placing a wire (diameter about 1/8") under the bed.
Every little improvement helps the overall impression of this being a "real" railway.
January 26, 3:00 PM Model Trains
The ballasting is proceeding smoothly at the moment. I have almost finished half of the inner mainline loop. I spent about 2 hours with this activity this morning and another hour this afternoon.
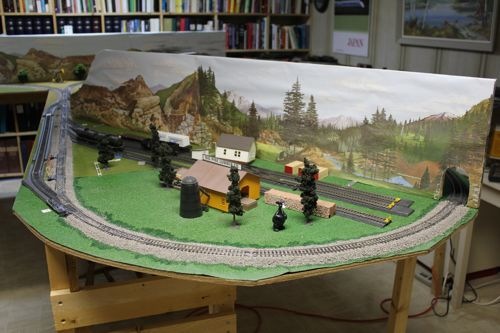
This is a picture of the ballast on the outer mainline at the back and the outer reversing loop on the right
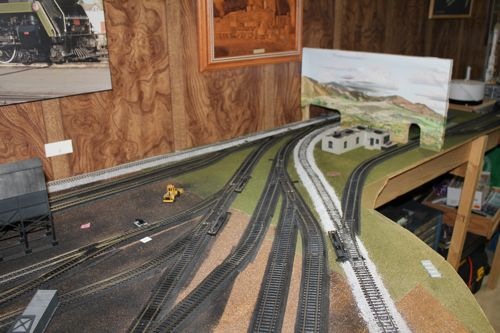
This is a picture of the inner mainline loop.
January 25, 3:00 PM Model Trains
My immediate goal is to completely ballast the inner mainline track. Then I will have a close look at the ballast that I have applied to a section of the outer mainline. There are three switches on this section and they no longer seem to be working smoothly.
I spent a couple of hours this morning carefully removing loose ballast from five switches along the inner mainline. This turned out to be a very tedious activity as even a few granules of the ballast can seriously interfere with the switch's operation. I continue to learn.
More learning. While in the hobby shop yesterday I was sharing my stories about the importance of wetting down the ballast before applying the cement. There was another hobbyist in the store at the time and he described his process which was more precise than the one I was using. Instead of spraying the area of the layout with a fine mist of water, he used an eye dropper and much more carefully just added the water to the section of ballast he was working on. This also makes it easy to avoid getting the granules of ballast in the switch machine. The really important step was to add a small amount of detergent to the water before using the eyedropper. This reduces the surface tension of the water and prevents it from forming globules when it first comes in contact with the ballast.
Earlier this morning I viewed a YouTube video on model trains that described a few simple hints for the hobbyist. One of these was about banking the curves, called superelevating the track, so the outside of the curve is slightly higher than the inside of the curve. The hint involved using a piece of heavy string used for parcels and simply laying it along the surface of the table where the outside track bed will be placed.
I didn't have any string, but the diameter looked to be very similar to some medium gauge wire that I have. Perfect. Unfortunately I had already place the ballast on the section of the curve that I wanted to try this on. The good news is that I had not yet applied the cement. I brushed the ballast off the layout, removed the track along the curve, placed a 3' section of wire along the outside edge of the route, replaced the track bed on top of the wire, and then nailed the track onto the bed, holding everything in place.
Unfortunately, again, I then noticed that the vibration from nailing the track down caused much of the ballast that I had added to the straight section of track before the curve to move from where it had been placed. This has now been rebrushed into place but it took another hour to get back to where I was before I began changing the curve.
January 24, 8:10 am Model Trains
I have put in about an hour this morning laying ballast on my mainline track. It seems to be going well. About 1/3 of the track is now complete. There will be a short delay until I buy more ballast. Hopefully the Model Baron hobby shop will have some in stock.
[Addendum: 11:00 am]
The hobby shop had the ballast so I am now ready to continue applying it to the layout.
While in the store I bought a 40' gondola car (Great Northern) which will be a nice addition to my rolling stock. The Ship It! database has been updated so it should appear in the next iteration of the switching lists. I also updated the Bento database.
I bought one example of Instant Horizons background scenes to see if I could utilize this as a general background behind the outer mainline track that runs beside the wall of the room. It seems that it might work. But rather than trying to attach it to the walls I am going to see if I can find a thin sheet of foam or masonite that could then simply lean against the walls, with perhaps a few pieces of two-sided tape to hold it against the wall. I am optimistic that this will work.
January 23, 10:10 am Model Trains
Sometimes it makes sense to step back and wait a bit. A few days ago I began to add ballast to my mainline track on my layout. I soon developed a technique for adding the ballast that was fairly quick but when I tried to add the glue I encountered major difficulties. The glue would form a globule over the ballast and disturb the placement of the particles. The written description of the steps did not mention that this was even a possibility and, obviously, did not discuss how to prevent it from happening.
This morning I tried again with the same result as before. Then the lightbulb finally went on above my head. Try google! I typed in "adding ballast to track" and the first item on the list was a youtube demo of how to do this. Excellent!
Basically there are 3 steps.
First, add the loose ballast. I was doing this properly but the approach used in the video was even better - much quicker than my approach. Just pour the ballast onto the track using an empty plastic soft drink bottle with the top cut off so one can bend it to form a V. Then use a 1" brush to clear the excess ballast off the railway ties.
Two, spray the ballast with a fine mist. This is where I went wrong before. The idea is to wet the granules without dislodging them from the track roadbed. Getting water on the layout is not a problem - it just dries with no effect on anything. When the instructions I was following said to spray the ballast I thought they meant with the glue mixture, not with just water.
Three, add a glue mixture. Now I can use the large dropper and it just flows onto the ballast and seeps into the granules (no globules are formed). When it dries, everything is solidly in place.
It took me about 20 minutes to complete all three steps for a section of about 3'.
I now feel that I have a process that I can confidently use to complete this activity for all of my mainline track in a reasonable amount of time.
January 15, 12:30 PM Model Trains
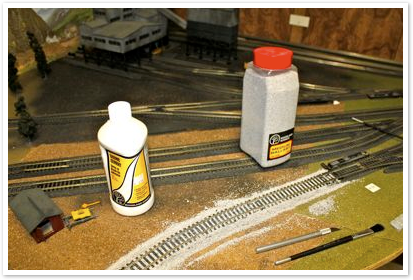
A few years ago I bought some ballast for placing on my layout main line tracks. Today I began placing it on the track and glueing it down. There is a technique to both stages. I am getting better at placing the ballast (small grey granules to simulate gravel) now that I am using a teaspoon to carefully place the stuff on the track ties. I then use a brush to sweep the granules between the railway ties. Easier said than done.
Applying the special glue mixture turned out to be more difficult than I envisaged. The instructions say use an eye dropper. Done. But the surface tension of the mixture forms a large globule that sits on the ballast and rearranges the particles before slowly being absorbed into the material. I'm not sure if there is a better way to do this. At the moment it is slow going. But what I have completed looks good.
January 4, 2:30 PM Model Trains
The DVD I ordered before Christmas arrived. It contains an amazing collection of color photographs of Canadian National freight cars plus detailed descriptions of the features of each style. I will use this to help me plan for some of the weathering that I plan to do on some of my cars. But first I want to spend a few hours just viewing the material. There is so much to learn.
December 30, 3:00 PM Model Trains
I placed the yellow wheel stops on the layout and did a little work on laying the ballast along a short section of the mainline track.
