
Pitch and time stretching in Ardour
In the old (analogue) days, these were related issues. The way you shifted pitch was by speeding up or slowing down the tape; fixing speed (e.g. Beats per Minute) involved changing pitch. Perhaps the most famous example of this is in the middle of Strawberry Fields where George Martin and Geoff Emerick were asked by John Lennon to splice together takes in different keys and tempos—which they did by speeding up the slower version (in A) and slowing down the faster one (in B) and hoping nobody noticed the slight jump.
Nowadays, of course, they can be independent (but don’t have to be). You can adjust pitch while maintaining speed, and adjust speed while maintaining pitch.
Here are some quick notes to myself on pitch and time shifting in Ardour, based on experiments I did yesterday.
Contents
Pitch shifting
This is the easy one. There are a number of plugins in Ardour that handle pitch shifting. Pitch shifting is apparently easier on single instruments than multiple instruments (or entire songs). Pitch change is expressed in semi-tones plus or minus (i.e. above or below) the starting pitch.
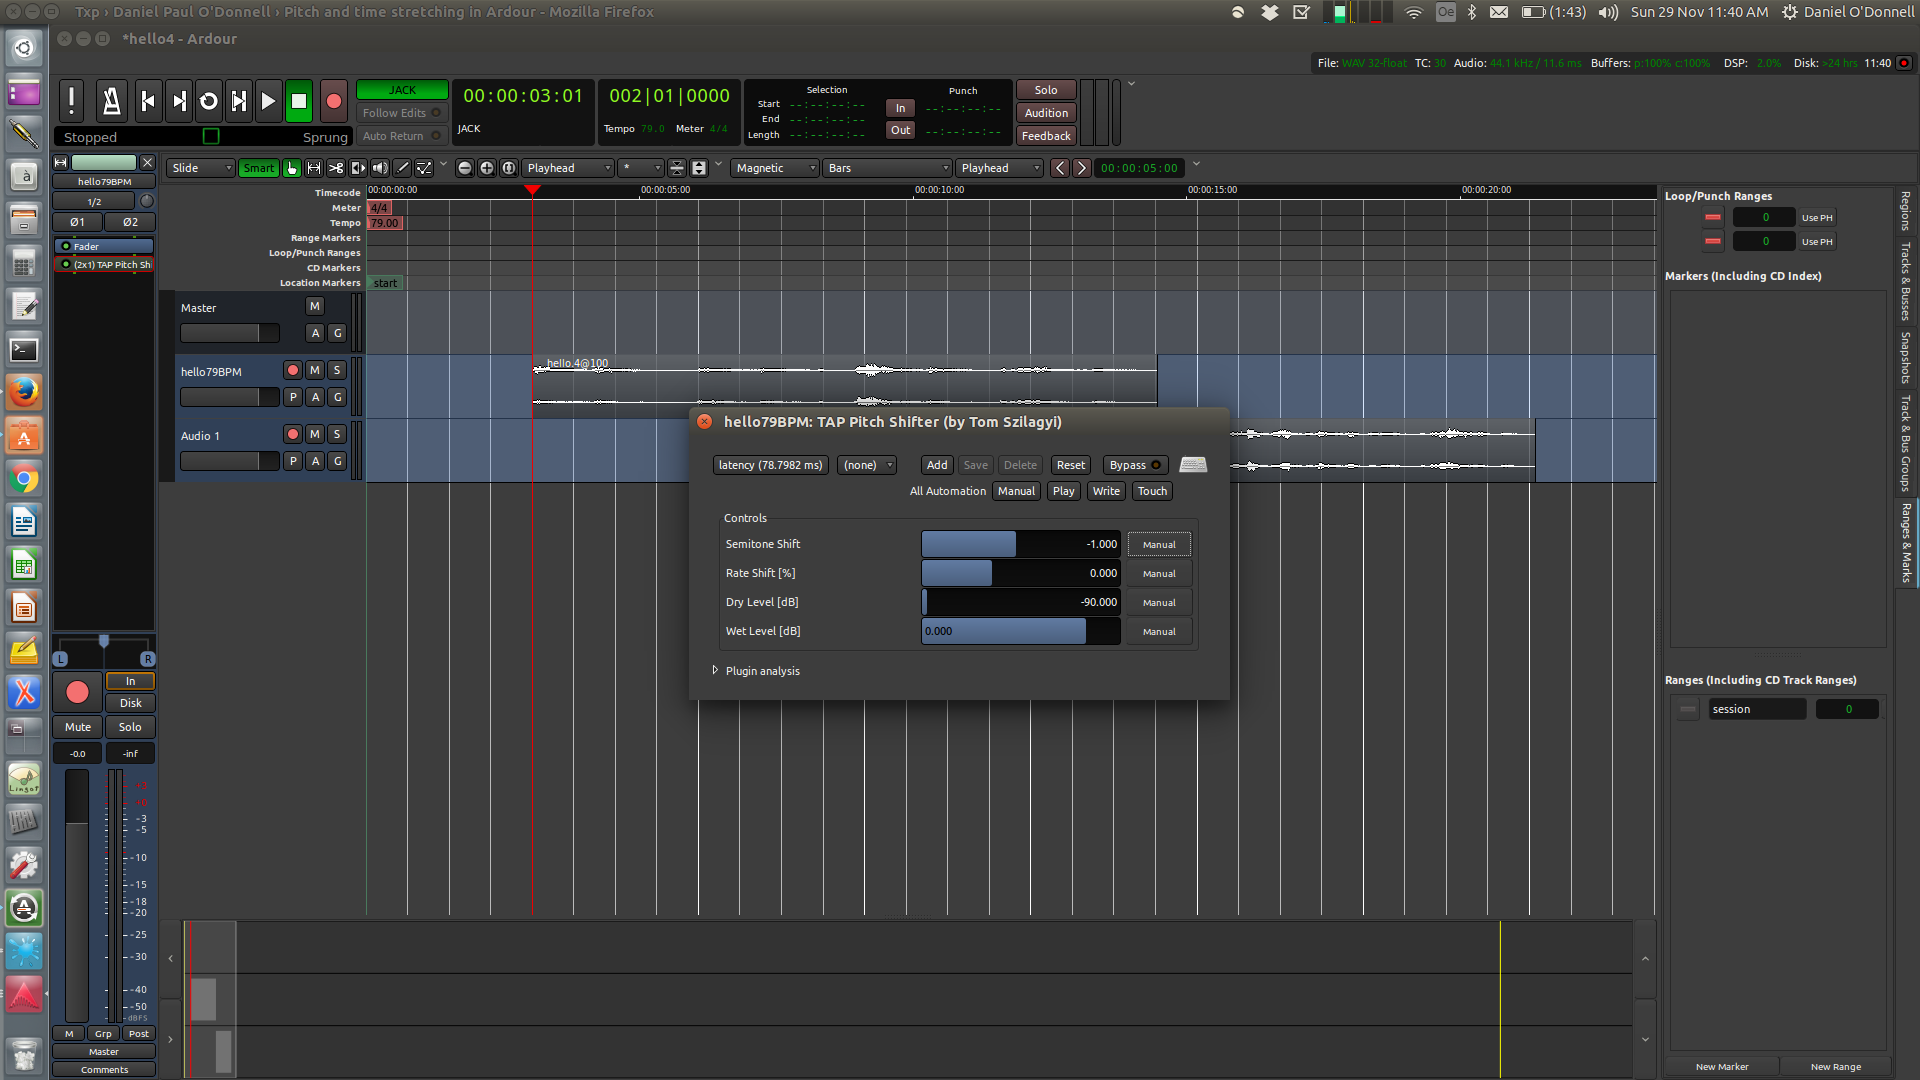
The above screenshot shows the settings for the TAP Pitch Shfiter used in this example. This is a sample from Adele’s “Hello,” where I dropped the pitch from the original recorded key of A♭ to G (i.e. a one semi-tone drop).
Tempo/Time shifting
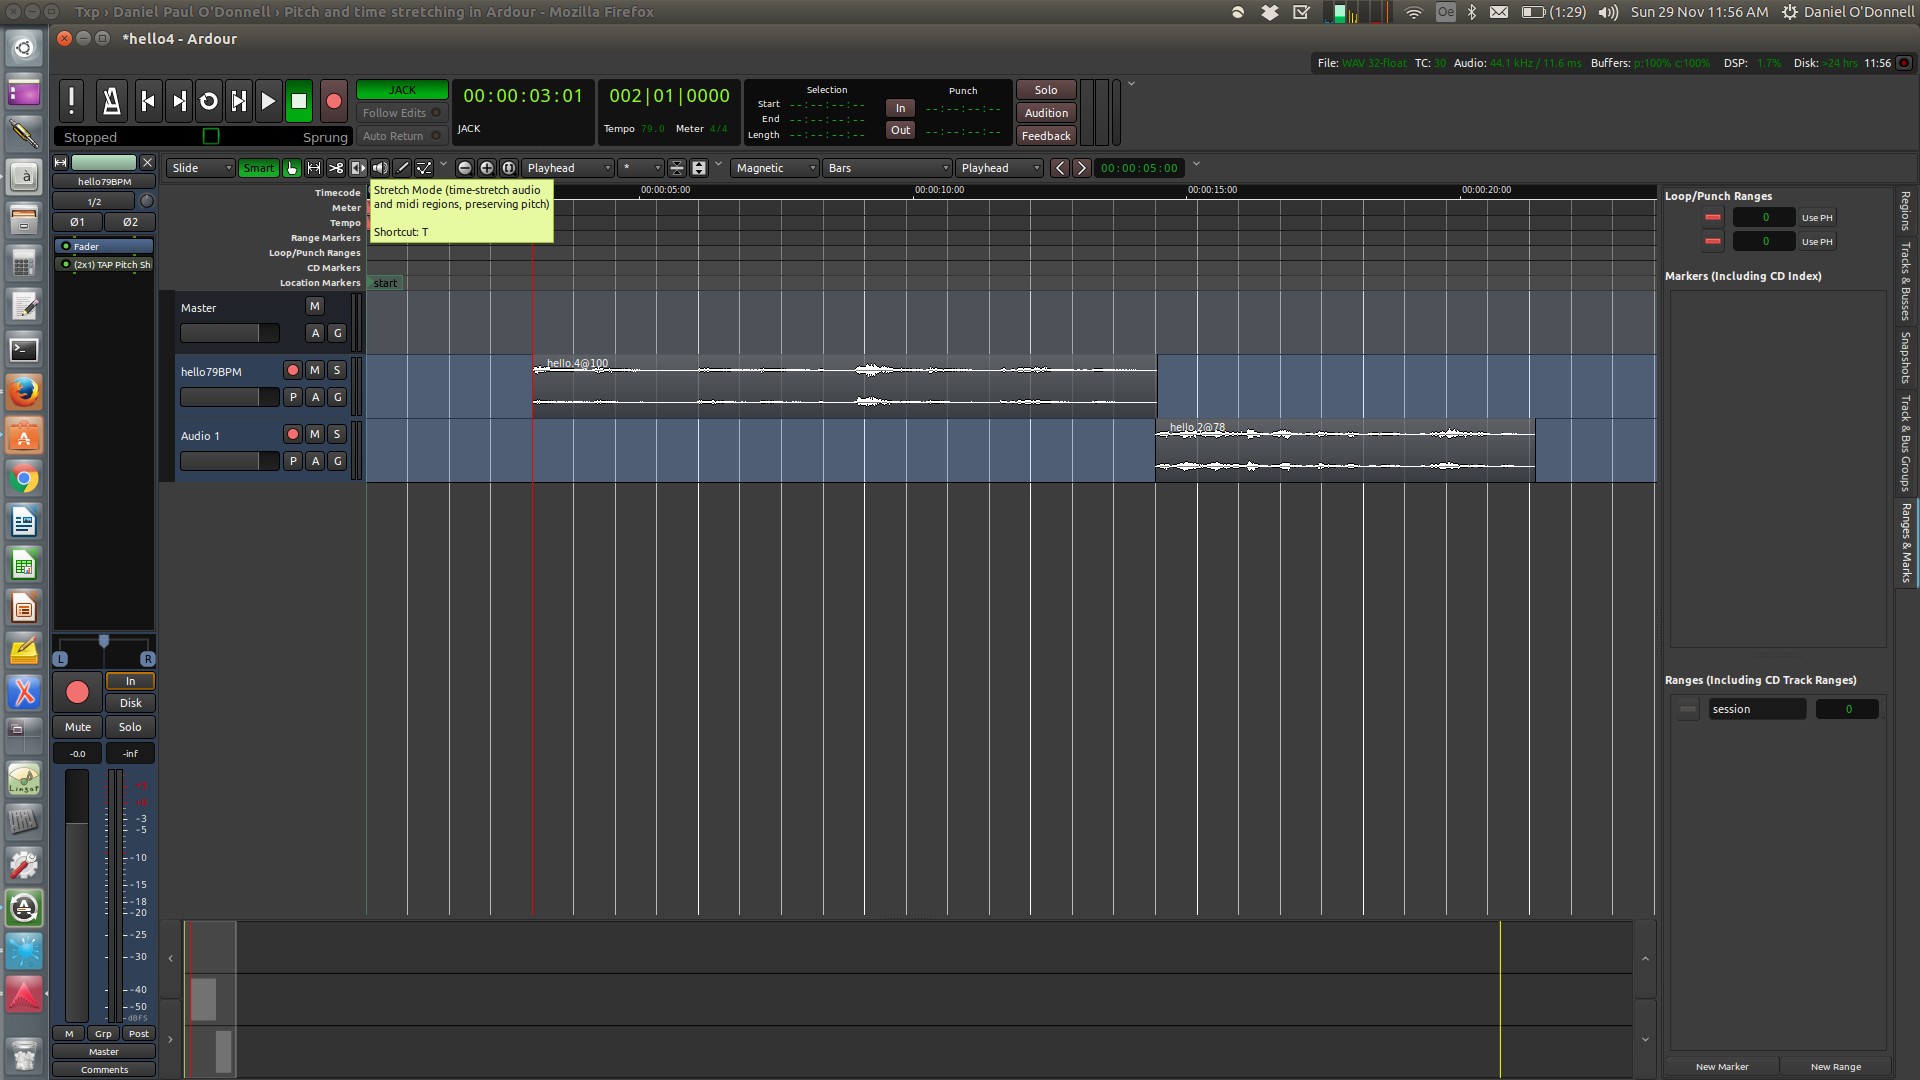
This is a little more difficult in Ardour, as you seem to have to estimate things visually rather than indicate what you want. It also took me a lot longer to figure out.
Here’s the method:
Click on the Stretch Mode Button (shortcut shift-t)
Highlight the target size (the size you want the sample to be)
Now drag the cursor along the track until you have indicated the length you want the processed region to be. This means, for example, if you want the region to speed up, the highlighted portion should be shorter than the original; if you want it to be slower, it should be longer.
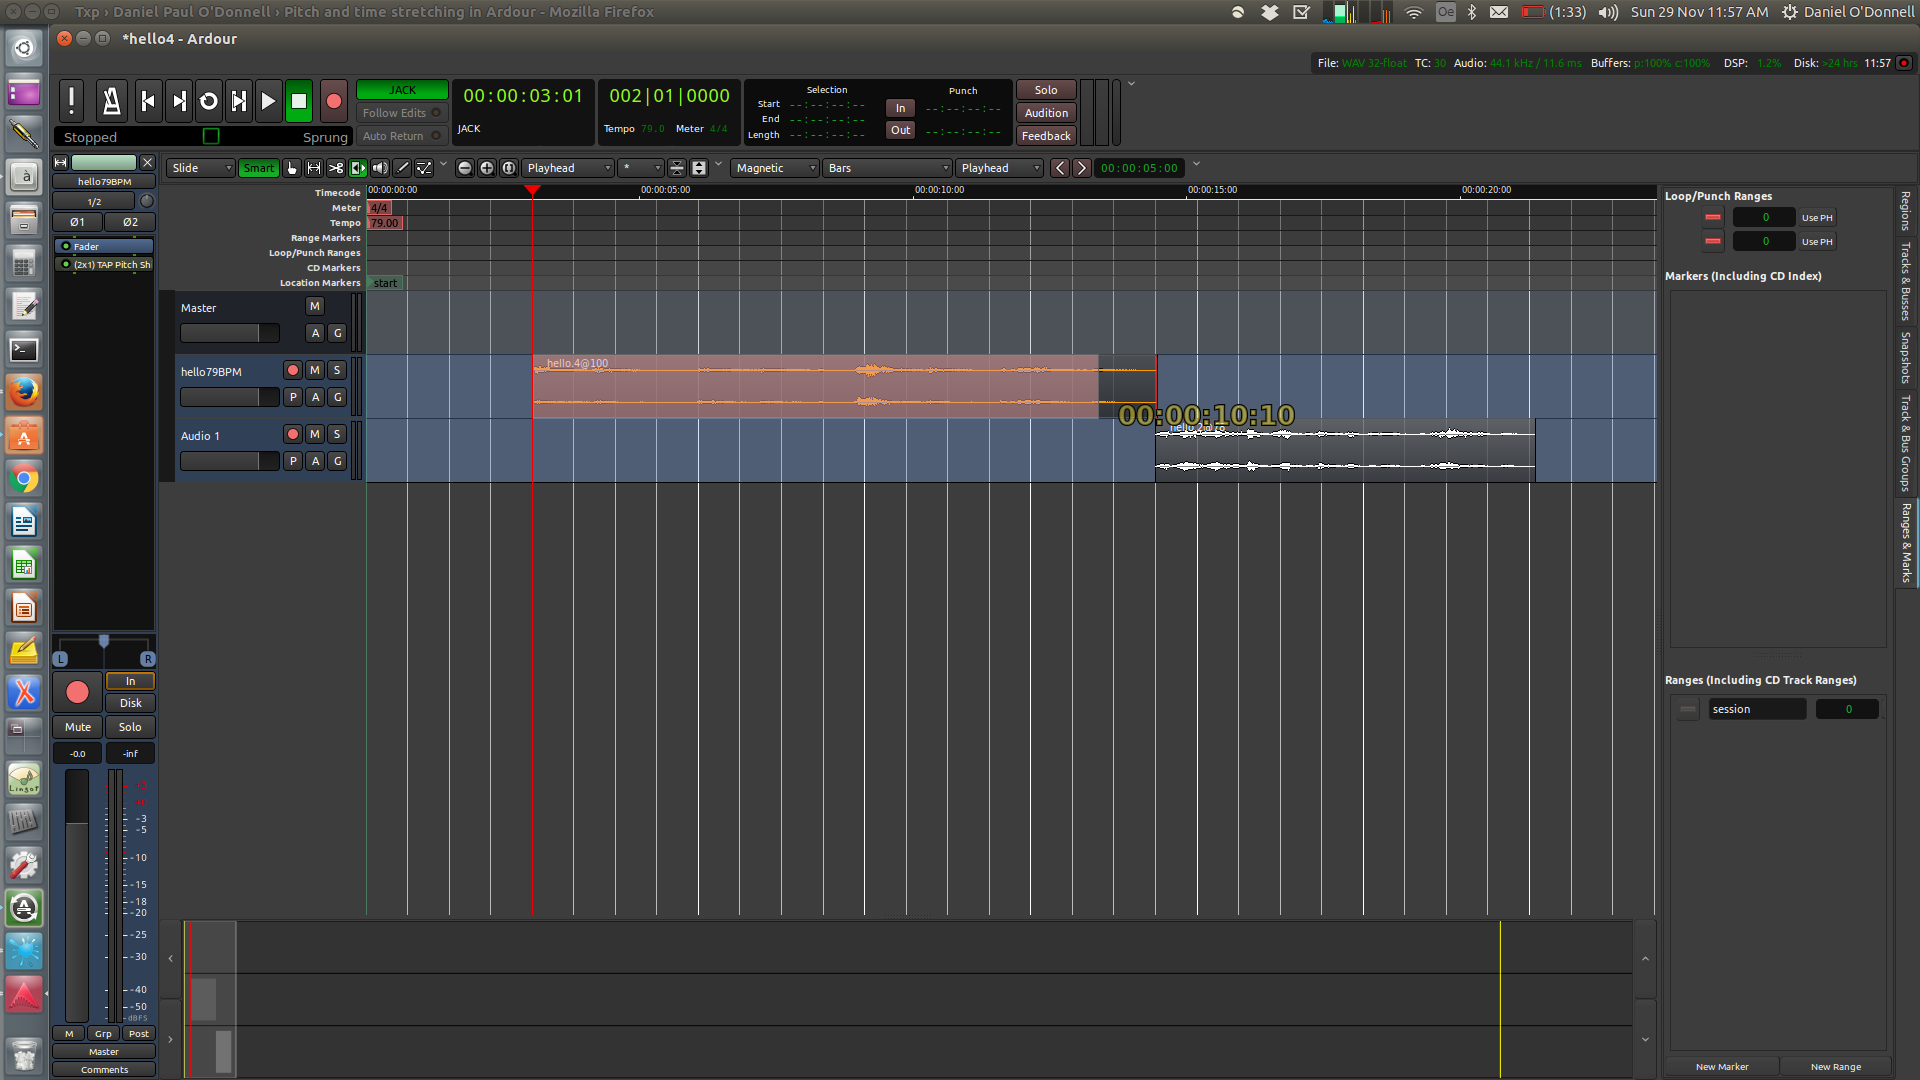
This is the great weakness of the system: as far as I can see, there is no way to indicate numerically the difference you want. So, for example, in this sample from Adele’s Hello, I wanted to change the speed from the original (very slow) 79 BPM to a little better 100 BPM (i.e. speed it up by 126.5%). In order to do this, I had to either eyeball it and guess or do some calculations on the length of the region. I.e. if the entire song is originally (let’s say) 4:50 and I want to speed it up to 126.5% of its original speed, then I need to reduce the overall length 3:49… I think. In the end, I had to experiment by switching the tempo and moving the track around against the different tempo grids in order to check that I was indeed hitting 100 BPM.
Not a great system. An ideal interface would allow me to indicate either a percentage increase or decrease or a target (and perhaps original) BPM, since this kind of calculation is what computers are good at and humans are not. It looks like Audacity has a feature that allows this, so at some point I will experiment with exporting to Audacity and then processing.
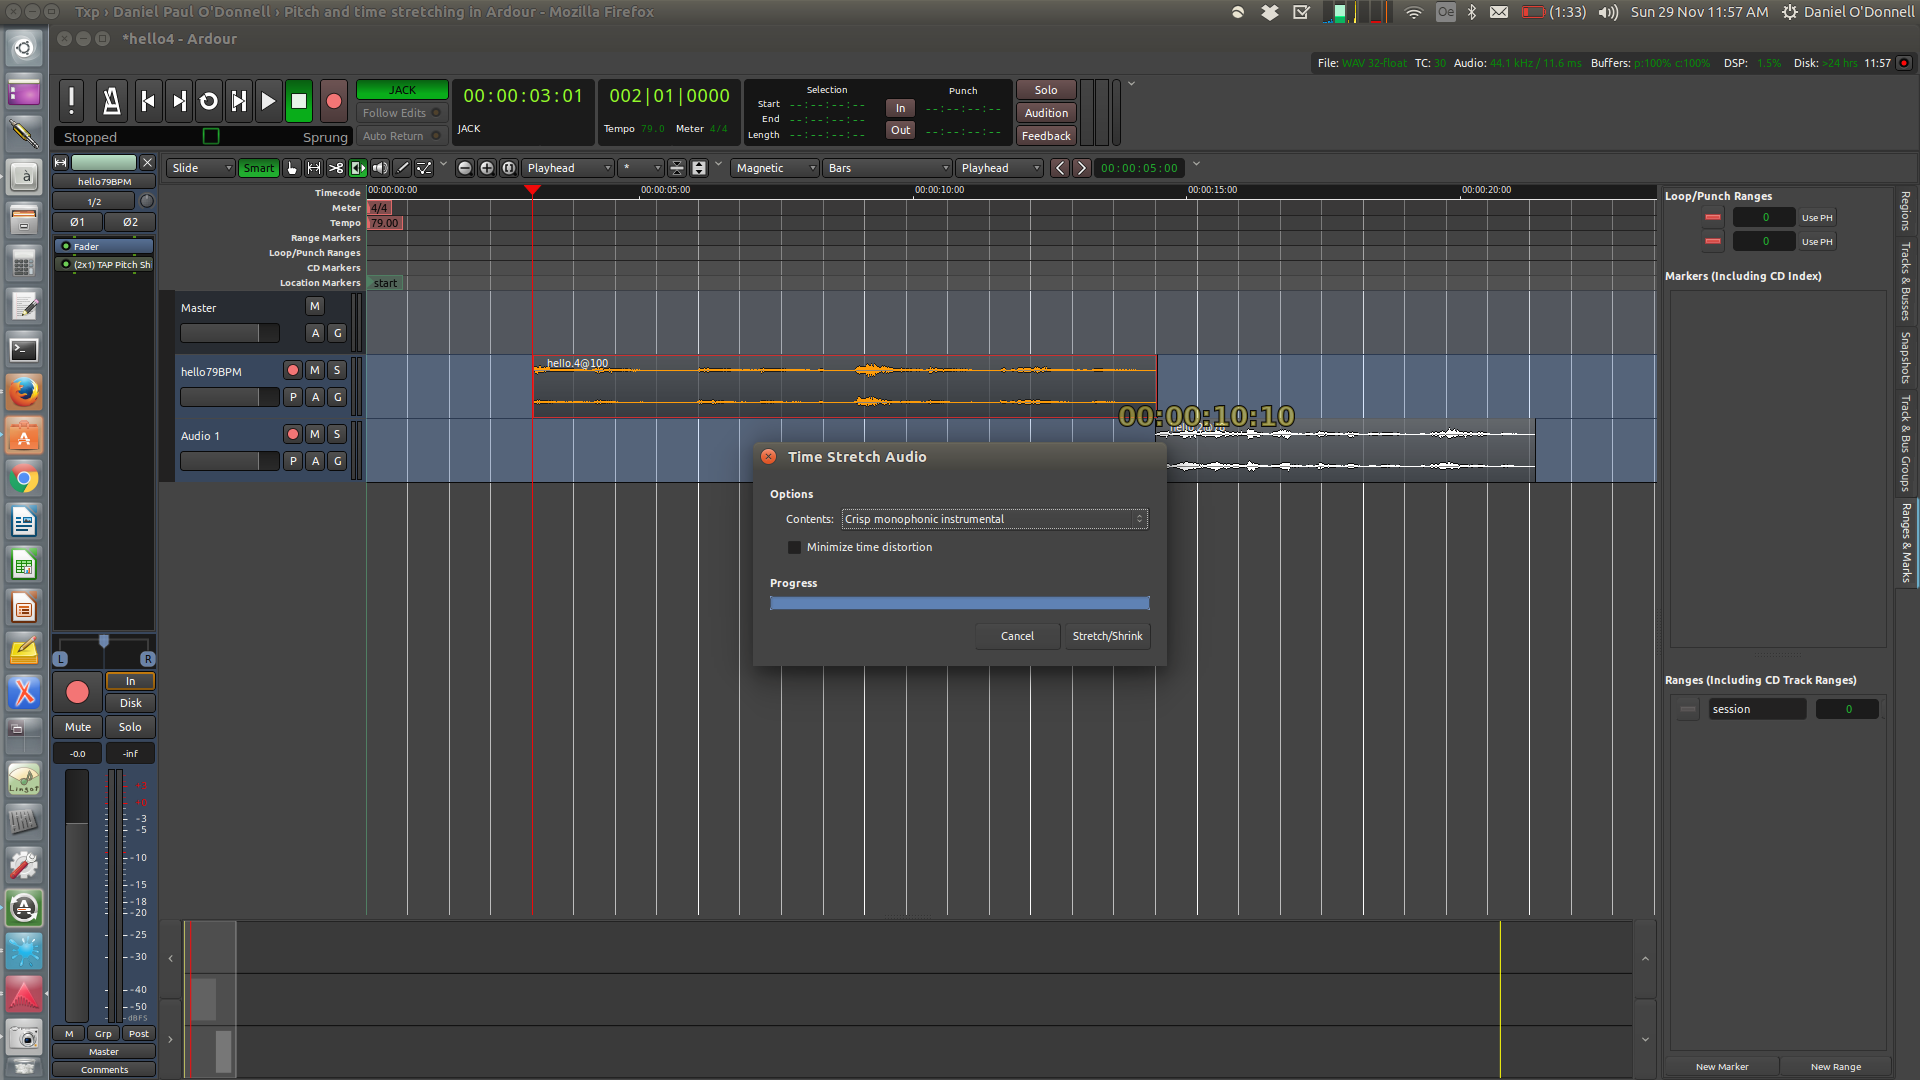
Select the conversion format
Finally, before the processing can happen, you need to select the conversion format. Crisp monotone instrumental is your best case; in my case I was doing a whole song, so I chose “balanced multi-timbral mixture.”
When you click on “Process” the change is applied. Here is a sample showing original (79 BPM) and fast (100 BPM) Adele.
Conclusions and Notes
It was interesting to learn how to do this, though I was more disappointed than I thought I’d be by it (I think disappointed in the actual results rather than an artifact of the specific filters I used).
Of the two things, Tempo shifting was the least musically displeasing. I think the Adele song is actually better a bit more up-beat and speeding it up by almost 27% didn’t actually affect the musical quality as much as I thought it would.
Pitch, on the other hand, was remarkable in its effect. A one semi-tone difference is not too bad—once you get used to the difference in timbre, Hello doesn’t sound too off in G.
But I was surprised how fast this could become ugly. I originally wanted to do this for a very specific reason. About 15 years ago, I wrote a song called Water under the Bridge that looked back on a college romance. An important part of it was about listening to Bob Marley and I’ve always thought it would be cool to use a sample from his “Is this love” over the backing track.
When I went to compare the two songs, it turned out I was pretty right in my sense that they’d fit together well: the speeds were about right (Marley’s song was only a couple of BPM off the 116 BPM we’d recorded at) and the melody intervals more or less matched (i.e. if the pitch were the same, the melodies of the two pieces at that point would be at least in harmony, but in fact overlapped a fair bit). The only issue was that the songs were off in key by three semi-tones: “Water under the Bridge” was in C, and “This is love” seems to be in A.
Even though it doesn’t sound like a lot, 3 semi-tones turns out to have a huge effect on the sound: here’s the original sample and here’s the same sample played 3 semitones higher. The other solution, dropping “Water under the Bridge” 1.5 semitones and raising “This is love” the same amount (so that they both came in half-way between B and B♭) didn’t produce anything any better sounding.

