
Model Railway
a. Layout
Building
Design
DCC
b. Locomotives
c. Cars
d. Operating
e. Summaries
Photos
Model Railway: Building of Layout (1/3)
(Structures & Scenery)
I have been thinking about how to best control the turnouts in the Coaldale Yard.
At first I was opting for using the Atlas sliding switch that comes with the turnouts but after looking at it, and at the track in the Coaldale Yard I realized that the Atlas switch does not hide the wiring very well. Ideally I want some form of switch that only shows the actual switch on one side of a mounted surface and has all of the wiring on the other side of the surface.
I also found one Access switch with a red and a green button for controlling a turnout. In my ideal world I would like the button to light up indicating the status of the turnout. I will now sit back with my Walthers catalogue and see what I can find.
That worked. I have identified the products for both controlling the turnouts as well as a mounting panel. I think if I ordered an 8-switch panel and a 5-switch panel that I will have what I want for the Coaldale Yard. I am backing away from lighted bulbs, even though such systems exist, as the cost is about $20/switch, compared with about $5/switch. I think that being close to the switches implies that I can see the status of each switch and therefore will not need the lights.
I think the next step will be to see if I can find any of these products when I am next in Calgary. My head is a lot clearer now than it was a couple of hours ago regarding what I will need to buy and what the final result will look like. But it may be some time before I can actually begin installing the wiring.
What can I now do? One possibility is to begin assembling another structure such as the water tower. I can also begin adding ground cover to the sanding tower and the refinery ballast.
I opened up a small kit for a station platform (Atlas #707). There is an option of having one large platform or two small platforms. I looked at the setup and decided that one large platform, placed on Refinery Row, would look best. The pieces are realistically colored and I will stay with that for the moment. It will be easy to change later if I decide to do that. The first real step is to glue the two platform bases together as well as the two roof pieces.
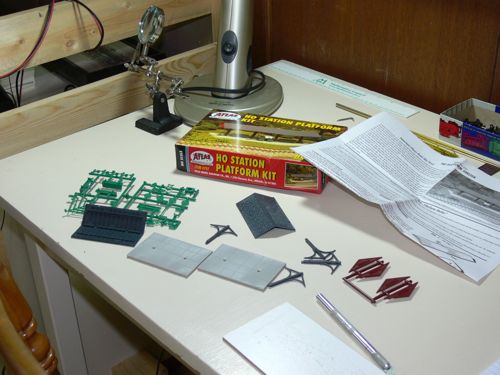
only a few pieces
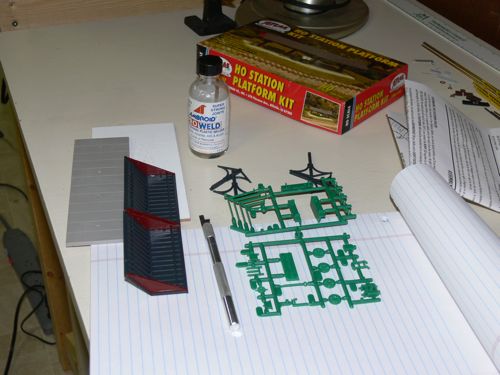
base & roof being glued together
Now to let the glue firmly set before continuing.
I made the following comment to myself earlier this morning:
Model Trains: I have two major projects on hold at the moment. Installing decoders in 5 locomotives is waiting for the decoders to arrive, and installing a control panel for the Coaldale Yard switches is waiting for a trip to Calgary to see if I can locate the necessary parts. But I am now moving on to a third major projects which is the assembly of my remaining buildings. I started on a loading platform yesterday and will begin work on a UGG grain elevator today. I also am motivated to begin putting a little more effort into my groundcover and scenery. I also want to play a bit with the idea of having distinct layout sections with a barrier separating them. A clear plastic barrier along the sides might also be a good idea as it would prevent accidental mishaps as I walk around.
Now to move to the basement and begin working on the buildings. ...
I have tried placing a few pieces of wood shelving on the layout to get a sense of what it might look like if I put "barriers" between the various sections of the layout. I like it! I will need 3 pieces of 12" pine shelving, each 8' long. By cutting these into appropriate lengths I will have barriers (with tunnels) between Black Diamond, Distillery Row, Pine Ridge, Prairie Dog and Queenston. I have some sky blue cardboard that may work as a more realistic backdrop. ...
It has been a full day, focused exclusively on installing "barriers" on my layout. I bought the lumber and began cutting a couple of pieces to length. Fortunately not all of them. As I began placing the wood on the layout it quickly became apparent that it would help if I altered the location of some of the track in order to make each discrete section more attractive or functional. In most cases this involved moving the track a little further from the edge so I could cut out a tunnel portal rather than having a notch in the barrier where the barrier met the edge of the layout.
However three of the changes involved a little more modification. One was in the Distillery Row section where I had to change the location of a switch in order to place the barrier at the location that would separate Black Diamond from Distillery Row.
The second change was a result of placing a barrier in front of Queenston. There was no longer room for the Interchange track that I had in that location. I was reluctant to lose this feature but finally convinced myself that a passing track near Pine Ridge could serve this function.
The third change was the result of adding a barrier between Pine Ridge and Prairie Dog. I used one of the turnouts that originally was part of the Interchange track and added a spur line along the Prairie Dog side of the barrier.
I then cut tunnel portals and cut a couple of the barriers to the proper length.
All of the barriers (4 in all) are now in place on the layout. However they still need to be fastened down and much to the track needs to re-tacked down.
Here are a few photos:
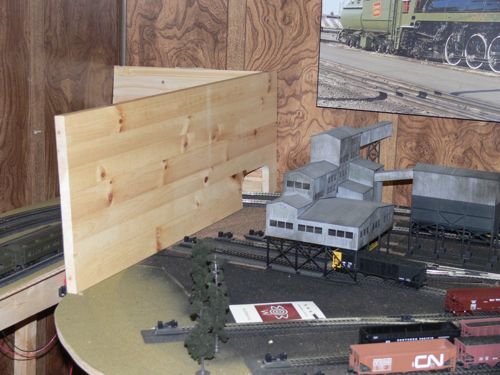
barrier between Black Diamond and Jasper yard
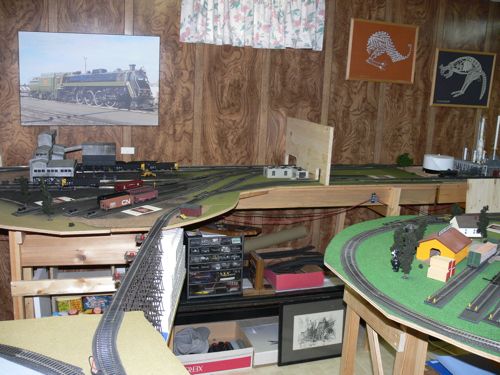
barrier between Black Diamond and Distillery Row
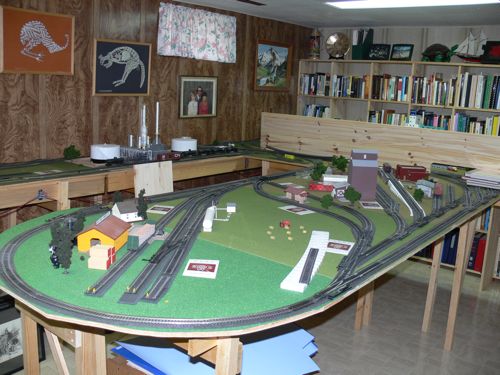
barrier between Queenston and rest of layout
barrier between Pine Ridge (on left) and Prairie Dog
I would say that I spent about 7 hours on this activity today.
Next steps include:
The first two steps are critical. As soon as they are completed I will be able to begin running trains again.
At the end of yesterday's session, identified the next steps in my goal of setting up a series of 4 barriers that would act as a form of visual enhancement for the various activities once I begin running trains between the different locations. The barriers help remove the distraction of having different locations which are supposed to be miles apart in plain sight of one another.
I visited a hardware store this morning and bought some angle braces and screws (total cost $16.79) and then began attaching them to the pine shelving. I soon realized that I only need a few braces to give the barriers a solid join to the table tops.
I then tacked down the track that had been moved to make each area slightly more attractive and functional. This entire process took about 4 hours.
I am not sure what to do next. I want to clean up the basement floor and make sure that everything is ready for running trains. Then I want to run a few trains over the track and verify that the trains can run over the layout without any derailments.
Then I will start thinking about how to finish the wooden barriers to make them appear more realistic. ...
I have been very productive today. I ran a train around the entire mainline track and had absolutely no problems. My first impression of running the train with the barriers in place does indeed improve the sense of being in different places as one moves along the track.
I also finished assembling the station platform. It is now in place in Distillery Row.

Loading Platform in Distillery Row
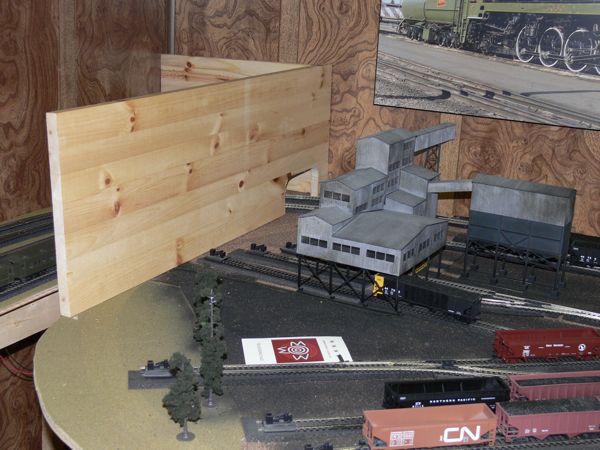
Black Diamond
Distillery Row
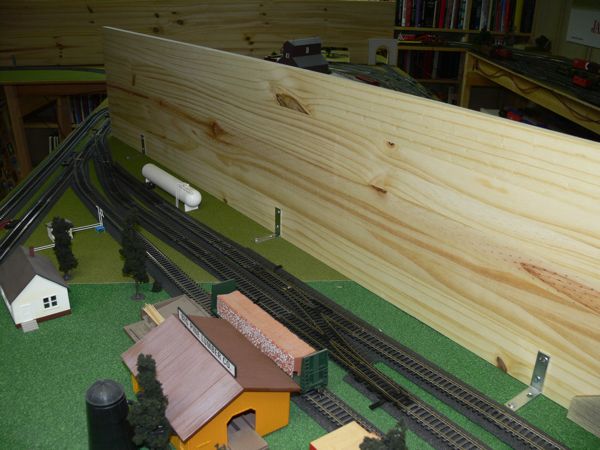
Pine Ridge
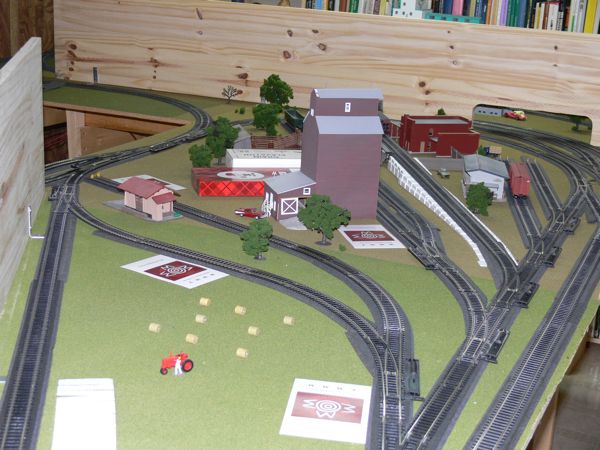
Prairie Dog
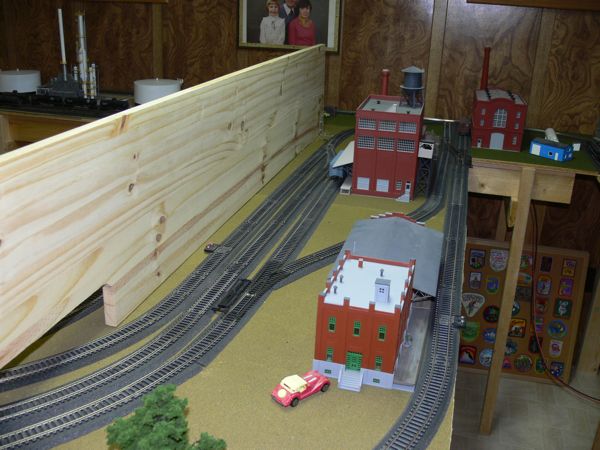
Queenston
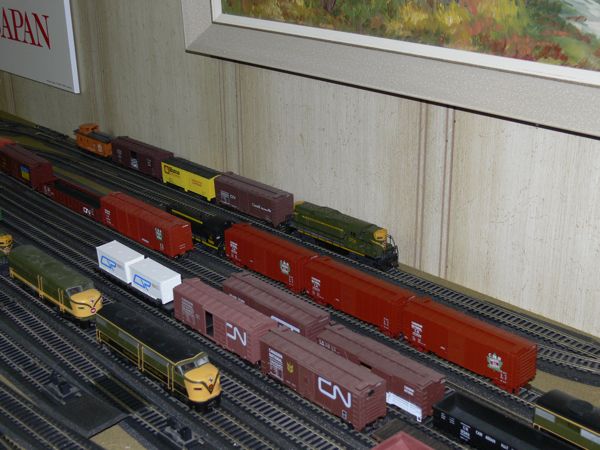
Coaldale Yard
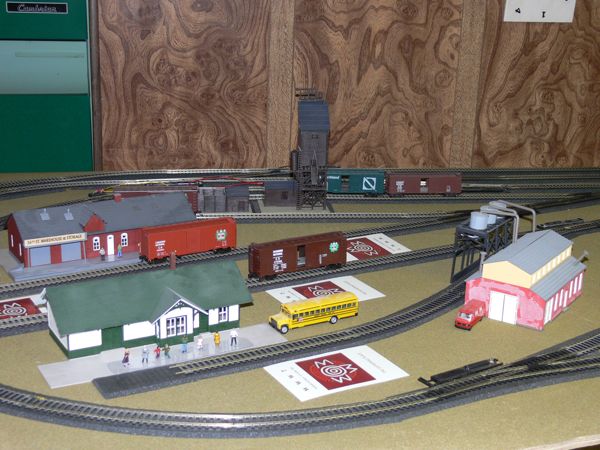
Jasper Yard
I have begun to assemble the kit for a UGG grain elevator. The kit uses a different kind of resin plastic and I had to visit the local hobby shop to see what they suggested for a glue. The kit suggested contact cement but the hobby shop doubted that would hold. I checked the two types of contact cement at the nearby hardware shop and the labels were not very encouraging so I ended up buying a new type of cement that is supposed to be good for plastic and gives me about 30 seconds to move the pieces together before it sets.
I spent an hour trimming the edges of the pieces that will form the basic body of the elevator. They are also slightly warped. The kit suggests putting such pieces in the oven with a weight over them to get them to lie flat. But I will have to be careful to not cause them to melt. I might begin with a hair dryer and see if that will work.
One hour on trimming and another hour on the visit to the hobby shop. But I think that this will assemble much more quickly as there are not a lot of pieces. But, as is often the case, it is a new learning experience.
My next train stop was at Trains and Such. Yes, they did have some CN Wheel Stops. I bought 4 packages (2 sets of stops/pkg).
I then asked about switch control panels. The previous owner overheard me and said they might have something in a bin of "old stuff". Sure enough, they had 3 packages, each containing a control panel that would operate 6 switches. I bought all 3 packages with a discount of 30%. These look ideal - even better than what I had in mind. The box says Acme Model Engineering, part # 306.
I am about to wire one switch to the control panel I bought a couple of days ago. I want to verify that I understand the wiring connections and that everything works. ...
The test of the wiring worked perfectly first time. I ran one wire from the Accessories connector on an MRC power pack to the switch control panel and another wire from the second Accessories connector to a terminal strip. I then connected one end of the 3-wire (green-black-red) cable to the switch. The other end was attached as follows: black to the terminal strip, green to the green connector on the control panel and red to the red connector on the control panel.
I plugged the power pack in and turned it on. Then I tried pressing the red and green buttons on the control panel. The switch moved back and forth as intended. Good. I now have the wiring firmly under control.
The next step will be do the actual wiring of 12 of the switches in the Coaldale Yard. ...
I have been working on the Coaldale Yard layout for the last hour. It began as a simple effort to install the wires for some of the switches. However as I worked on this (I now have the wires attached for 3 switches) I began to realize that some of the track work is not aligned properly. This then meant that I had to remove many of the nails fastening the track to the tabletop and am now trying to reset the track so all of the track is perfectly lined. ...
I still have some work to do moving the track, but I think I have it all under control. I will lose two classification tracks in the yard, but it now looks less congested and more realistic.
I have put in about 3 hours moving track around on the Coaldale Yard. Overall I am pleased with the result. I have lost 3 classification sidings, but the net effect is a much cleaner layout. The previous arrangement was too cluttered. I still have a few short pieces to install but I think that the present system is 95% complete.
I then realized that I could set up a slightly different numbering system that would be easier to remember. The new system uses exactly 12 switches, which works rather nicely with the 6-switch control panels that I recently bought.
The track has not been firmly tacked down yet. I still need a few short pieces in order to have everything meet properly.
I have just returned from the Model Baron hobby shop. My order from early May has arrived. It included:
The task of cutting the scenery to size and attaching it to the pine barriers between scenes will wait a bit before I tackle it.
This morning I began by cutting the top off one of the Instant Horizons sheets (which was just blue sky) and I began to see where the bottom half would best be placed. There were a few possibilities but then I began to play with a couple of new ideas. I rarely have a clear plan and then execute it to completion. Rather I have a sense of a plan but then often make refinements as I see how it is unfolding. It is best described as a process of successive approximation.
I think one of the barriers should be extended to the wall to achieve a better sense of separation between two of the areas and another short barrier should be installed to accomplish the same aim in another area of the layout. Finally, there are two places where the end of the barrier should be modified to a more gradual slope. There will be sawdust in the garage this morning.
With the weather making outdoor activities unpleasant, this is a good time to make some real progress. Here is a short list of tasks:
When these tasks are completed I will only need to add a few more sheets of Instant Horizons and wire a second control panel for the Coaldale Yard and I will be fully operational. I still have some buildings to assemble but that is a relatively minor aspect of the layout. The emphasis will quickly shift to running realistic trains rather than building the layout. ...
It has been a productive morning. I have cut and mounted the two new pine barriers and modified the ends of two other barriers. I have cut one of the three Instant Horizon sheets but will need to buy some spray adhesive in order to mount it on the wooden barrier. I have attached the wiring to 5 of the 6 switches for the first control panel. And I have cleaned the entire layout of sawdust. I spent some time trying to join two pieces of 3-strand wire together in order to have enough length to reach the control panel. Once I had that fixed I realized that the area of the join would have to pass through the small hole that I drilled in the tabletop. But I have just found a roll of three strand wire (not the colors I would like but I can handle it) so this will now be easily set up. ...
I have wired the remaining switch with the 3-strand wire. More importantly, I have wired switch #2 to the control panel and tested the connections. It works. I have no unpacked a solder iron that I bought a few months ago and am about ready to solder the connections at the back of the control panel. It has been over 40 years since I last did any soldering (when I built a Heathkit stereo system in 1965). This is a great hobby, in part because of the all the different skills that are required. ...
I soldered switch #1 without any problems but ran into difficulties with switch #3 in the late afternoon and ended up spending almost 3 hours trying to troubleshoot it. I was able to take the switch mechanism apart and reassemble it, and it worked fine manually, but it still wouldn't work electronically. The problem (clearly) is with the mechanism and not the wiring.
I came back to this this evening and decided to replace it with a mechanism on another switch in a different part of the layout that would not require an electronic control. This worked fine. I then added and soldered switches #4, #5 and #6. The control panel for these 6 switches is now fully wired and soldered. This will allow me to control all of the mainline switches that are located in the Coaldale Yard. I still need to mount the control panel on to the table. I have this figured out and will take care of it in the morning.
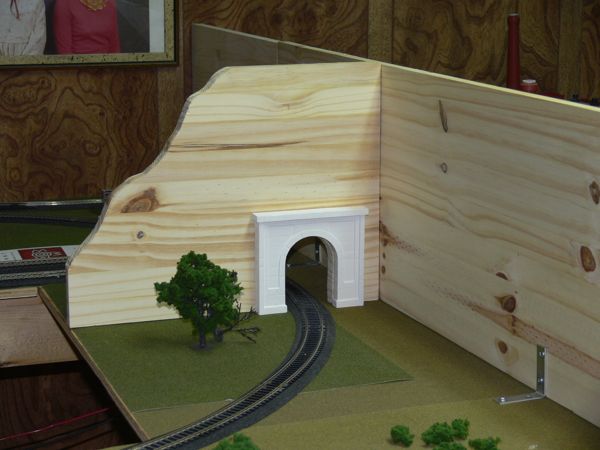
New barrier near Distillery Row
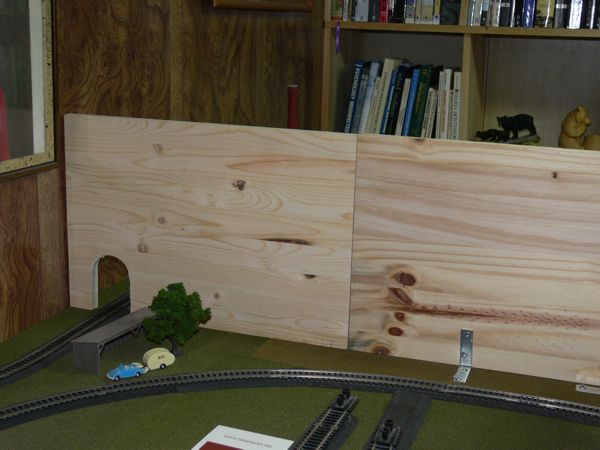
New barrier near Queenston
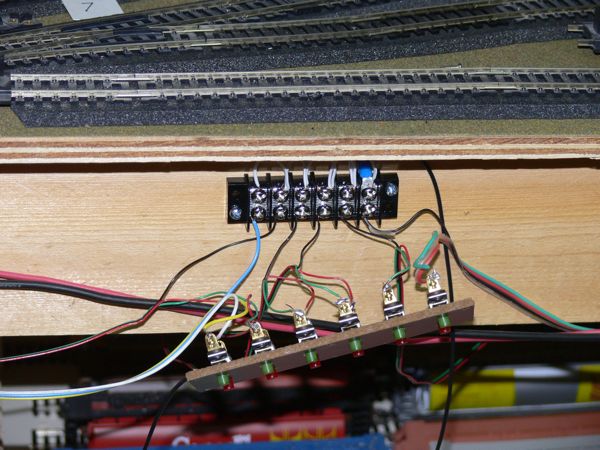
Wiring the Control Panel for Switches #1 - #6 in Coaldale Yard
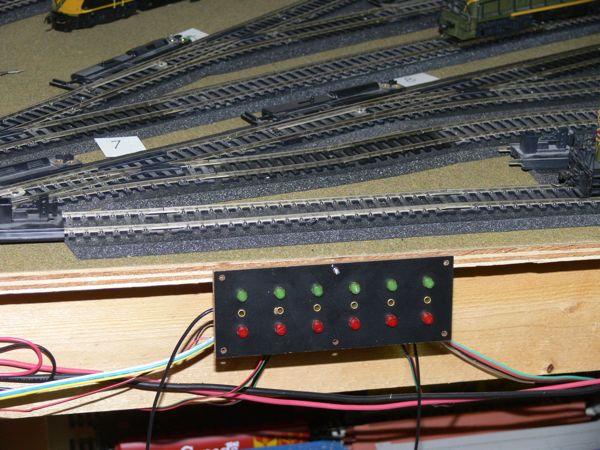
Temporary Mounting of Control Panel
The control panel for the 6 mainline switches in the Coaldale Yard is now completely wired. But it still needs to be permanently attached to the table top.
The instruction sheet for the Instant Horizons sheets suggests removing (if possible!) the backdrops and glueing the sheet to a horizontal surface and then remounting it on the layout. Fortunately my barriers are easily removed so I will try that today. But first I will need to go to a local hardware store and buy some spray adhesive.
Here are the additional activities that come to mind:
Another good day. I focused on electrical matters today. I have completely wired the second control panel for the Coaldale Yard. I have a couple of new ideas for mounting these control panels but this will require buying some angle brackets. I will have to wait until the stores open tomorrow morning. ...
I have just finished painting the 8 CN wheel stops a bright yellow. A small job, but so much of this hobby is numerous small jobs. It looks pretty good at the moment but I will wait until tomorrow to decide whether I should add a second coat.
Reviewing my two lists of activities above, I see that I need to buy one switch (right turn), some spray adhesive, and 6 angle brackets.
I have finished mounting the 2 control panels for the Coaldale Yard. All that remains for the part of the layout is to clean the tracks.
The current list of remaining items involves 4 separate activities and a total of 6 tasks.
I have had a close look at the layout and realize that although I have a "workable" layout, there are still a number of additional activities that need attention before it is truly "operational".
All of the remaining switches in Lone Pine, Queenston, Distillery Row and Prairie Dog are within each reach and could be handled manually. Some of these are mainline switches and probably should be set up with DCC control. Then I think I can program the entire mainline to set all of the switches at one time.
But the only item that is really affecting my operational status is the dirty track in the Coaldale Yard. ...
The track has been cleaned in the Coaldale Yard.
I have also mounted and connected the terminal strip that will hold the ground wires from each of the 6 switches in the Jasper Yard. All that is left to do is to connect a 3-strand wire from each switch to the control panel/terminal ground strip.
I am off to complete the wiring for the Jasper Yard. My goal for today is to complete this wiring and then work on the Prairie Rose track. I have made substantial progress during the last week and it is showing results. I now have finished the Coaldale Yard (both track and wiring the switches), which is the largest track system for my model train layout. If I accomplish my goal today I will have also finished the Jasper Yard (both layout and wiring) and Prairie Rose (track - no wiring required). Basically that will leave one DCC stationary decoder for 5 mainline switches plus the Instant Horizons covers for the barriers. There is no rush for either of these latter two activities. ...
There is a problem with my wiring of the Jasper Yard. I tested (always a good idea) the first switch and there was no response. I then worked my way back and discovered the problem. It is difficult to keep all of the wires straight in my mind. Rather than continue to struggle with this, I need to step back and think about how to best handle this. ...
I made a trip over town and bought two rolls of wire, one yellow and the other green. I am going to rewire the accessories circuit using these colors so I can see at a glance whether the wiring is for the mainline (red and black) or accessories.
I then made a brief visit to the hobby shop and bought a manual switch and a terminal section of straight track which will be used for my DCC programming track.
Finally, I bought a can of spray adhesive to attach the Instant Horizons sheets to my pine barriers. ...
All of the track (programming track, Prairie Rose sidings, switches) is now fastened in place.
I have begun changing the wiring for accessories, using yellow and green wires for this circuit. I still have some work in front of me as I replace much of the wire, but already I have been able to test the revised circuit to the set of switches in the Jasper Yard and it now works fine. Great. That was the important hurdle - making sure that I had the right idea for the circuit. The rest is just the physical detail of cutting and stripping wire and attaching it to the terminal strips and control panel. ...
I have completed wiring and installing the control panel for the Jasper Yard. It is a great feeling to have both the Coaldale and Jasper Yards now fully operational.
The next two priorities are to install the Instant Horizons scenery sheets to the wooden barriers and to install one Digitrax DS64 stationery decoder to give DCC access to 6 mainline switches behind Distillery Row.
The Instant Horizons scenery sheets need to be reviewed and a plan for the location of all such sheets drawn up before I begin acting on this. Then once I have fastened the three sheets that I currently possess, I will order the remaining sheets.
While in Edmonton I visited The Roundhouse hobby shop and was able to purchase a Digitrax DS64 stationary decoder. Then while browsing I bought one more Instant Horizons scenery sheet.
I now have the decoder I need to complete the switching control that I want for my layout. Another small step forward. It will not be very difficult to install this decoder as I have done this twice before.
I am rapidly closing in on the last important step in setting up the layout: the gluing of the Instant Horizons to my wooden scenery barriers. I should have this in place before the snow flies in November and I begin to run some operational trains on the layout.
I have begun to attach the four sheets of Instant Horizons scenery to my wooden barriers on my layout. This involves removing the barrier from the layout, placing it on a covered table in the patio, spraying the wood with an adhesive and then pressing the paper onto the wood. Part # 949-710 "Whistle Stop" has now been finished. It looks good. I think this is going to work.
However the next step is to identify exactly where each of the sheets (most still to be purchased) will go.
I have installed the Tall Timber sheet as well. But I will leave the two sheets that I have for the Queenston barrier for another day. I only want one barrier removed from the layout at a time.
I have ordered 9 more sheets of Instant Horizons. This will complete the necessary sheets to complete my layout barriers. I am hoping to have them arrive in about 2 weeks.
I have mounted the Digitrax D64 stationary decoder which will control 4 switches on the mainline track behind Black Diamond and Distillery Row. I then connected wires from all 4 switches but have not connected the other ends to the decoder. I also connected two wires from the mainline power grid but have yet to connect the other ends to the decoder.
I have completed wiring and programming the Digitrax D64. This means that I now can control all 12 of the mainline switches (with one exception, which is within easy reach) using the handheld controller. In other words, the entire layout is now operational. I have 12 switches under handheld control, 18 under control panel control and the remainder are easily controlled manually.
I received a phone call indicating that the 9 packages of Instant Horizons scenery backdrops have arrived. I drove over to Model Baron and picked them up. I now have a total of 11 packages that are now ready to be attached (glued) to the various wooden barriers.
It has been raining for much of the day and gave me a good reason for working on my layout. I have been working on glueing the Instant Horizons scenery sheets to the wooden barriers.
I have now completed the Lone Pine barrier which involved 2 sheets on each side of the barrier. The Lone Pine side has Tall Timber (#949-702) and Desert to Mountain Transition (#949-704). The Prairie Dog side has Whistle Stop (#949-710) and Desert to Country Transition (#949-707). This barrier is now complete and has been refastened onto the layout.
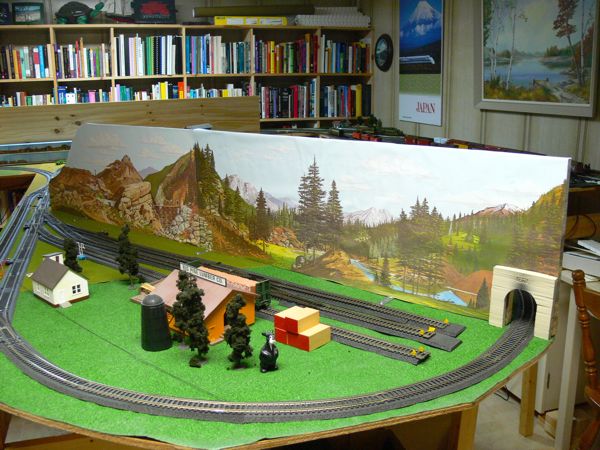
Lone Pine district
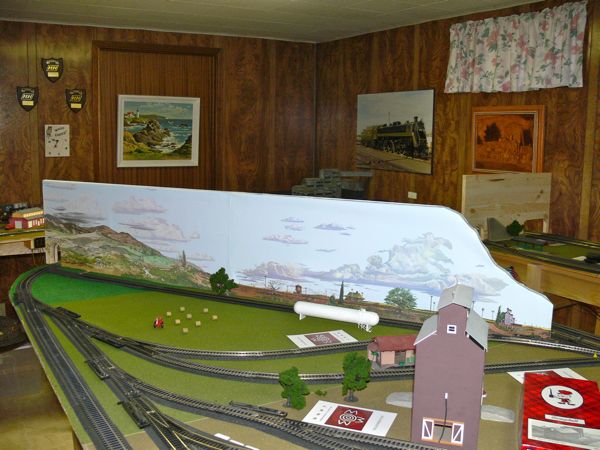
Prairie Dog district
I am waiting for the glue to dry on the Black Diamond barrier. This only involved 1 side and 1 sheet (#949-701) Sierra Boomtown.
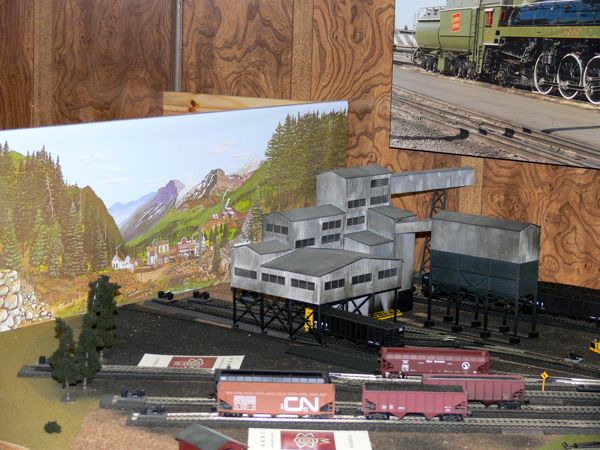
Black Diamond district
I have 2 wooden barriers still to work on. The Distillery Row barrier is relatively small and will involve 1 sheet on each side. The Queenston barrier is the largest barrier and will involve 3 sheets on each side. But I am getting the hang of how to do this now and do not anticipate any difficulties.
The rain is really coming down at the moment. I have removed the Distillery Row barrier from the layout and have glued one side of it with an Instant Horizons Desert to Country Transition (#949-707). ...
This took longer than I expected as I had to add glue to some areas that failed to attach properly on the first attempt.
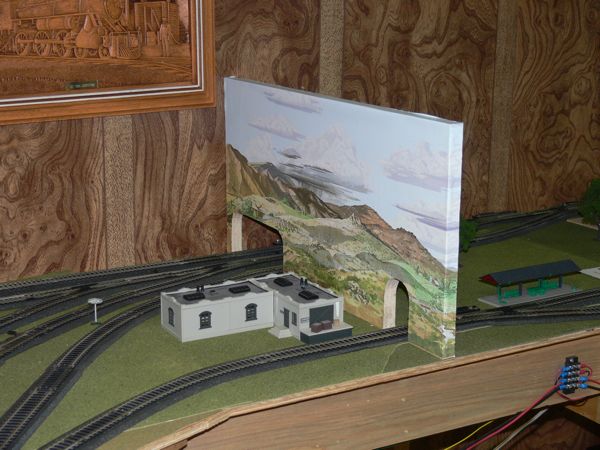
View showing side facing Black Diamond
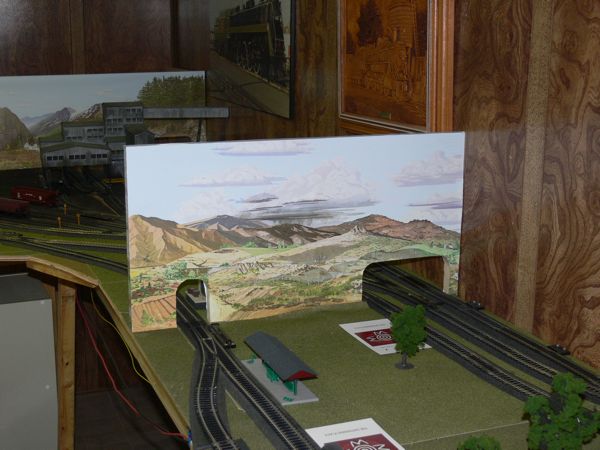
View showing side facing Distillery Row
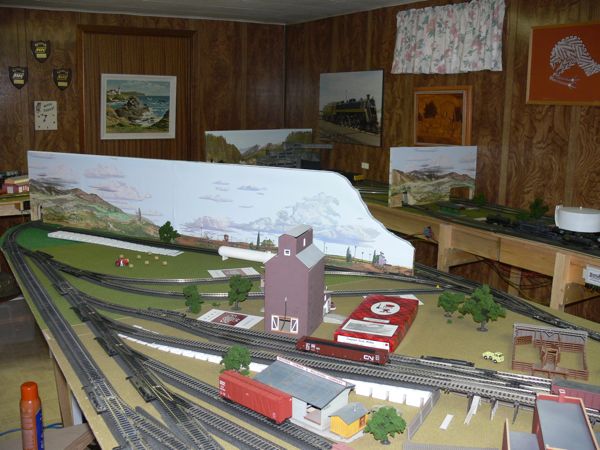
View showing 3 completed barriers
The goal for today is to complete attaching the Instant Horizons scenery sheets to the remaining wooden barrier. This barrier is almost 9 feet long, the longest barrier on the layout, and it will involve three separate pieces of wood. The main wooden piece is 7 feet long, there is an extension piece about 2 feet long, and there is another piece that butts against the 7 foot long section. Thus there are a couple of new features to this that I will have to think through.
I glued the first sheet (Freight Yard #949-711) to the main piece last night. And I have just glued the second sheet (Hotel/Business #949-712) to the main piece. ...
I have finished gluing the Instant Horizons sheets to the barriers. However I now realize that I will need one more sheet to finish a small abutment to the last barrier. I originally thought I would be able to piece together a small section but it turned out to be impossible to find a matching piece. I will need to order one more sheet before I am completely finished.
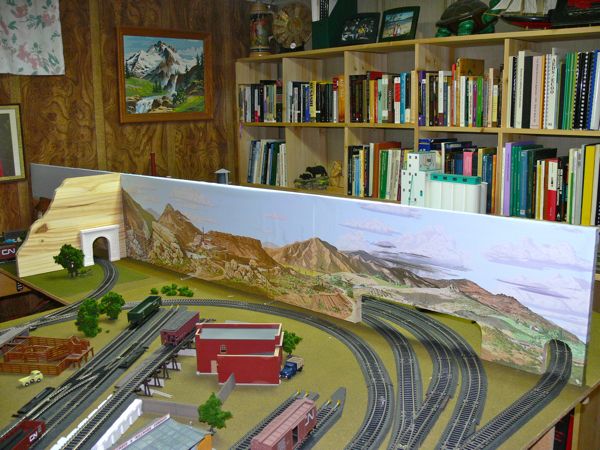
End of Prairie Dog district
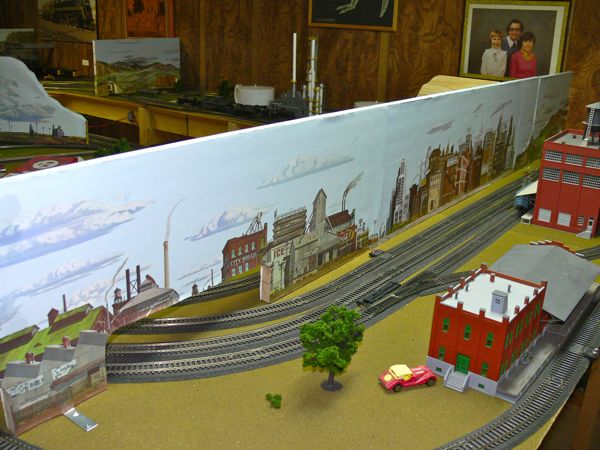
Queenston Heights backdrop
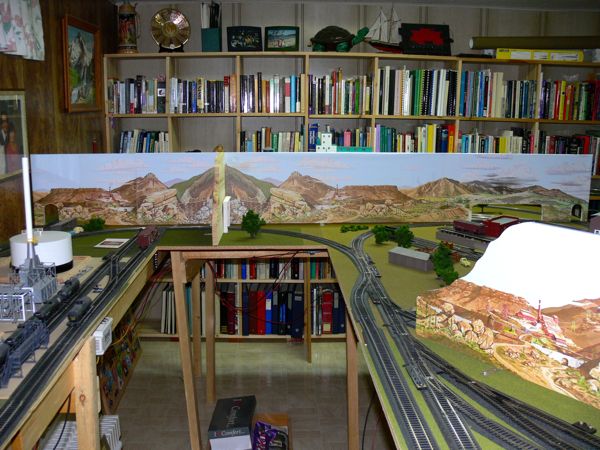
Looking straight at End of Prairie Dog district (Queenston on other side)
I have just placed an order for one sheet of Instant Horizons (#949-701 Sierra Boomtown) to complete the scenery for the layout. It should arrive in about 3 weeks.
I drove over to Model Baron to buy a sheet of Instant Horizons that I had ordered a couple of weeks ago. I have removed the wooden barrier that it will be glued to and hope to finish this aspect of the layout in the next few days.
While doing this I noticed that there were places where the other sheets had come unglued from the wooden barriers, so there is a little maintenance work needed here as well.
I have been working on my layout since 10 this morning. In only three hours I have accomplished everything that I had hoped for. This included tidying up my working bench as well as the layout as well as completing the final touches to the Instant Horizons background scenery.
Here are some photos:
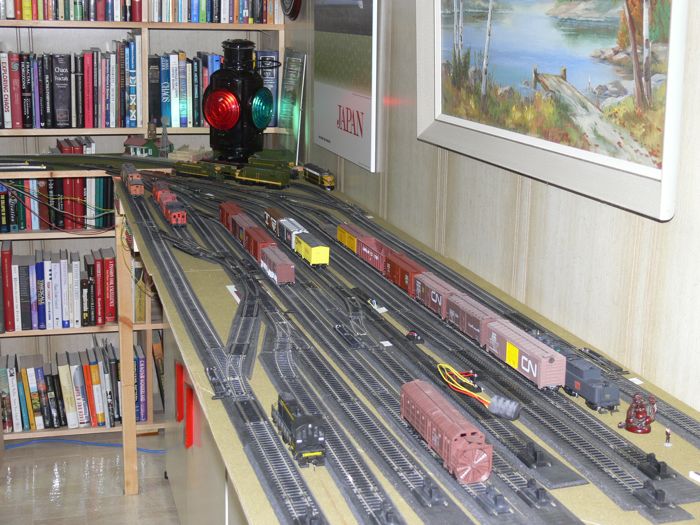
Coaldale Yard (note lantern in background)
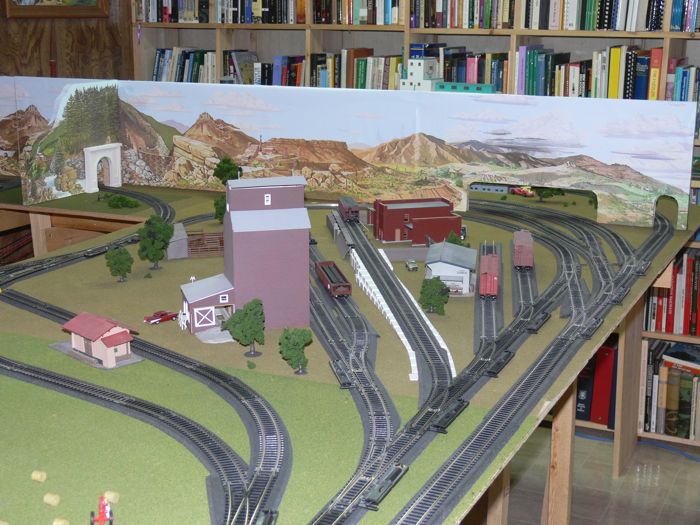
Prairie Dog (a small prairie town)
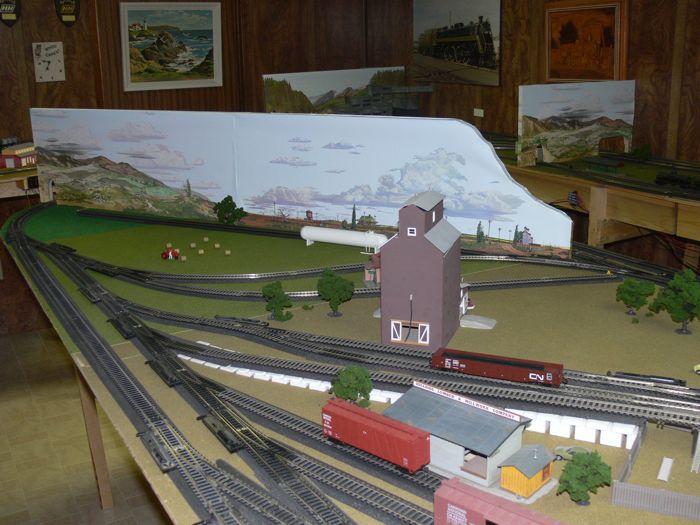
Prairie Dog
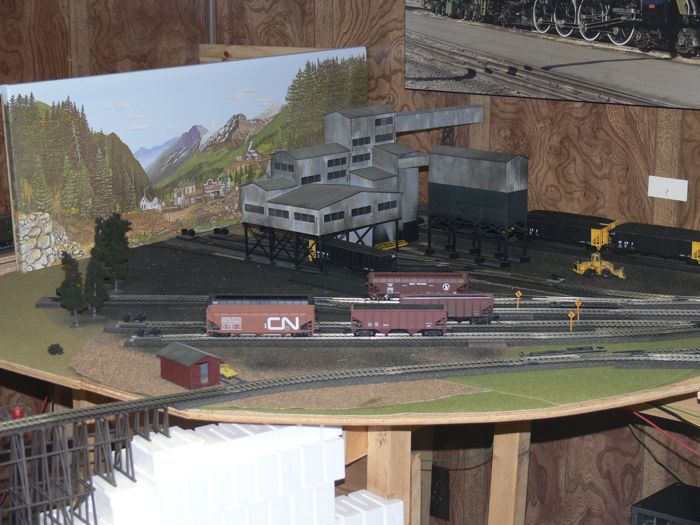
Black Diamond (coal mine in the mountains)
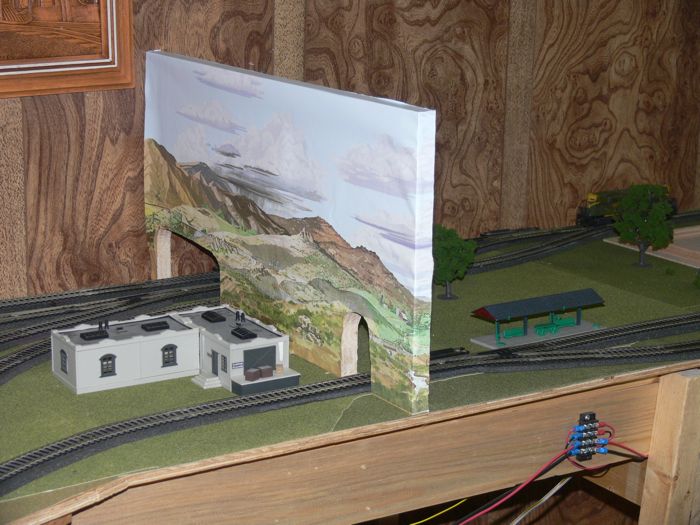
Leaving Black Diamond and entering Distillery Row (in the foothills)
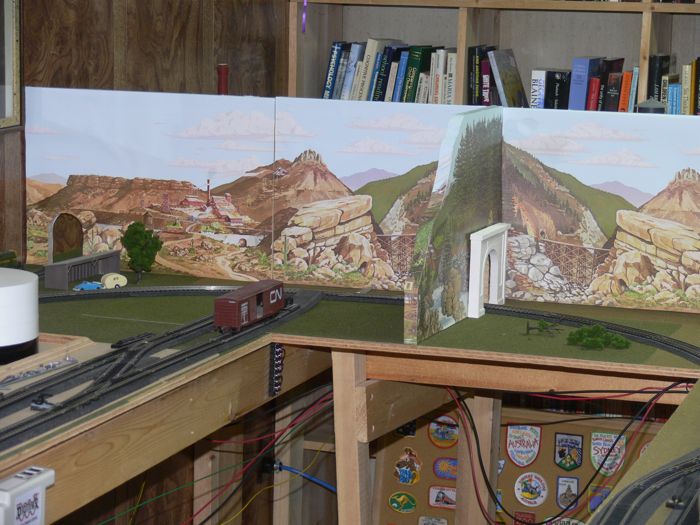
Distillery Row on the left, entering Prairie Dog on the right
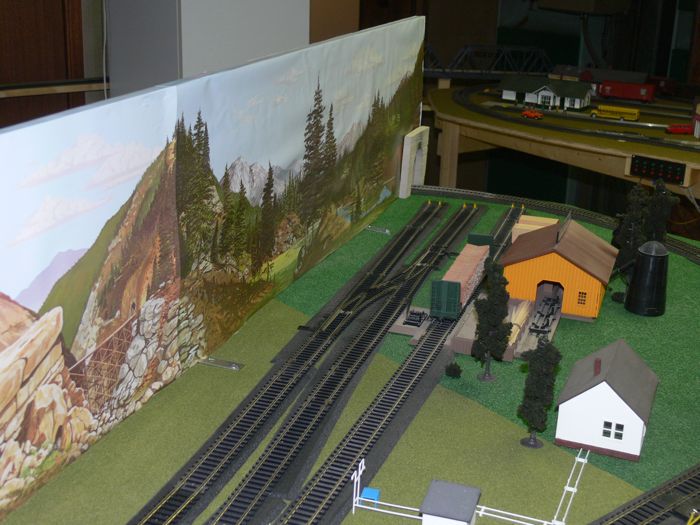
Lone Pine lumber mill in the mountains
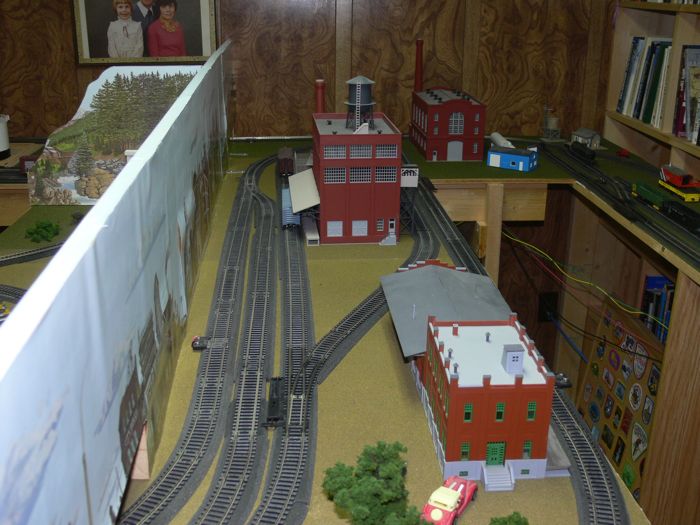
Queenston (a small urban center)
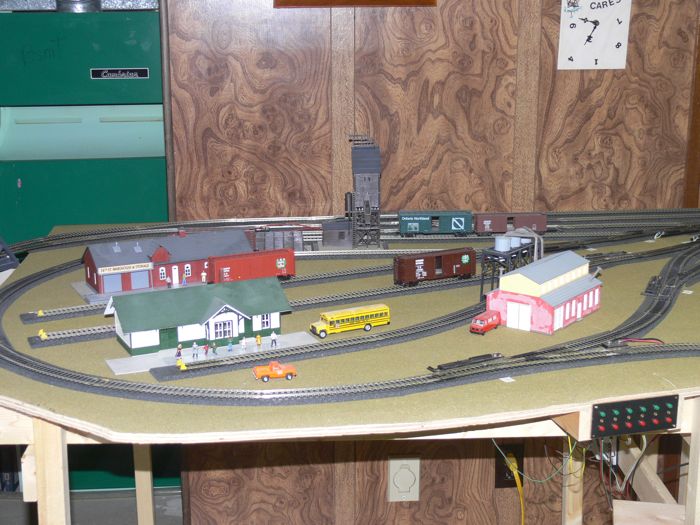
Jasper (a small town)
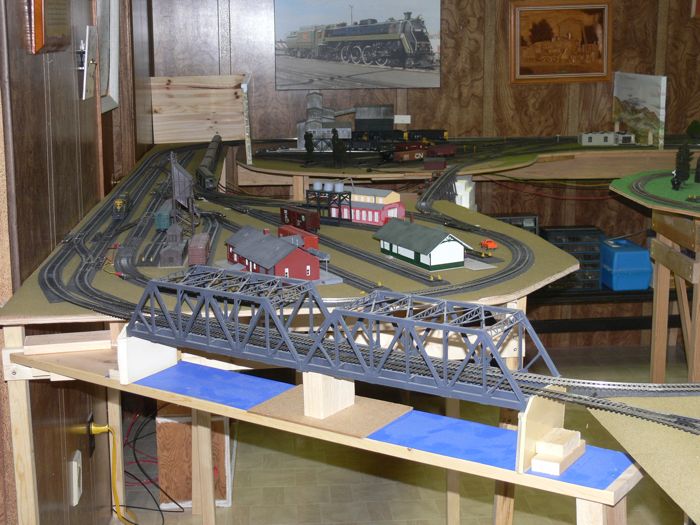
Jasper
While sitting in front of the screen and reflecting on my efforts to date, a couple of thought come to mind. Importantly, I am delighted with what I have produced and am having a lot of fun with the many different aspects of the hobby.
On the other side of the coin, the most annoying aspect of the layout is the duck-under as I enter the room. I really want to improve this. I do like the external mainline loop around the walls of the room but I need to find a way to easily add the duck-under so I can walk into the room, place the bridges in place and connect the track, run the trains, and then easily remove the bridges and walk out of the room.
Thinking about this for a minute, the solution is a simple board with the track and bridges mounted on it. Then have the rail joiners slide to complete the connection. The board plus bridges should be as light as possible. I may loose a little realism by not having the bridge abuttments but the convenience of not having to crawl into the room will more than offset the lack of this feature.
I have had a quick look at my Canadian Railway Modeller magazine and noted that I have numbers 1 - 5 of volume 16. The last issue is the January-February 2009 issue. Now to purchase the remainder of the issues for this year.
While collecting these issues together I noticed that the number 1 issue for volume 16 contained an article on a "lift out duck under". Exactly what I want! I have read the article and can take the basic idea of how to ensure that the lift out piece will fit snugly into place. A good reason for getting back to reading more about this hobby.
Continueing to think, I may be able to keep the bridge abuttmants. The plywood board just needs to be set to fit about 4 inches below the general layout level.
I need to rewire the two switches that were moved earlier this week when I made a small modification to the track layout in the Jasper Yard. This involves a little more work as I will have to drill a couple of new holes through the table top as well as solder the new wires to the control panel.
I now realize that I did not have to modify the track layout, but having done it I like it. It has simplified the overall routes in the Jasper area as well as straightening out a small kink in the line. Each small step is an improvement. But I continue to think that this phase of preparing the layout is virtually completed.
I also realized that although the spur lines in the Jasper Yard can hold the passenger cars, there is no easy way to pull them out and form a consist. Therefore they will occupy one of the classification tracks in the Coaldale Yard. That seems to work okay. I am now beginning to fine tune the operational features of the layout.My goal today was to run the passenger train on the inner mainline track. Simple enough.
Uh-oh. I have an unexpected problem. Two of the tunnel portals are too narrow. I never noticed this until now as they were wide enough for the freight cars. But two of the portals are on a curved section of track and the passenger coaches are almost twice as long as the freight cars. This means that on a corner the middle of the car tends to cut the corner and in these two cases it rubs against the wall of the portal and derails. This is not a simple problem as I will have to remove the barriers in order to cut a wider opening. But it will have to be done if I want to run the passenger cars on the inner mainline, which I do.
Now that I am thinking carpentry, this may be a good opportunity to try to build a solid, easily-removed, duck-under structure. I am getting tired of always having to crawl under the duck-under each time I enter or leave the room. This would be a better project during the summer months when the garage is warm or when I could work out-doors. It is -7 C at the moment and there is a light snow falling. I will back the car out of the garage and then set up the saw for a little cutting.
Definitely a situation of one step forward and two steps back. But I continue to sense that I am almost finished with these types of minor adjustments. ...
The carpentry is proceeding quite well. I have the new duck-under almost finished. All that is required is to attach the bridge abutments to the duck-under and re-lay the track. This turned out to be much easier than I first expected.
I have been looking at the track layout in the Jasper Yard and have made a few more "minor" adjustments. By moving one of the spur lines I was able to make room to place the passenger station alongside the mainline. This is much more realistic as I can now have a passenger train, going in either direction, stop here without any switching. Good.
The duck-under is now in place but it still needs to be firmly fastened together so it can be lifted as one piece. I also have an idea for adding some rockwork to the bridge abuttments. A coat of grey paint will finish this. ...
I have finished assembling the duck-under. It is a solid structure that is easily lifted out as one piece. Hopefully it will be as easy to remove. The glue attaching the bridge abuttments to the structure is now setting. Then I plan to glue the bridge to the abuttments and glue the track to the bridge deck. That will give me one solid piece. ...
The duck-under is still looking good. I have nailed down all of the track in the Jasper Yard - it is now ready to go.
I have also enlarged the opening (tunnel) on the barrier separating Lone Pine from Prairie Dog and tested it with a passenger car. All is now well. I tested the remaining two openings with a passenger car and they both seem okay. I will glue the bridge to the abuttments tonight and then test everything tomorrow.
I replaced the switch in the Jasper Yard with one from the Prairie Dog location. It works just fine. So I have resolved all of the problems that I encountered during the last couple of weeks. ...
The bridge is glued to the abuttments but I am not sure if the glue will hold. I may have to try using my "Gorilla" glue which seems to bind anything to anything.
I have cleaned up the entire floor as well as the layout so I am ready for tomorrow.
The only time I actually need the bridges is for the outer mainline routes which go around the walls of the room. If I use the reversing loop at the Jasper Yard then I can put the bridges aside and walk into and out of the layout room whenever I want. I think I will use this option fairly often.
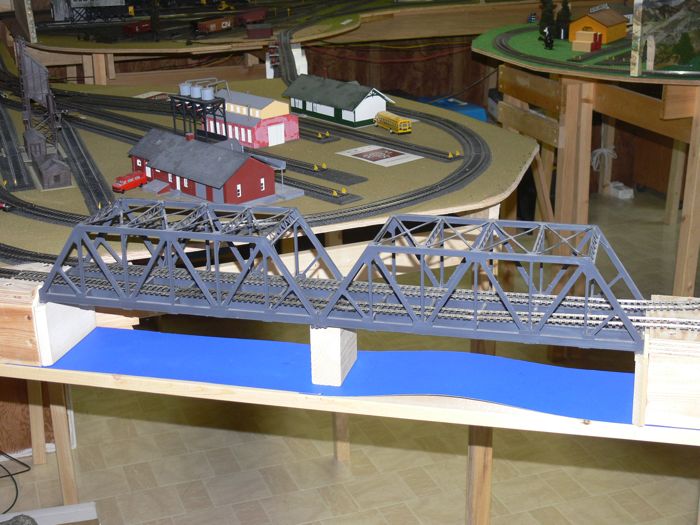
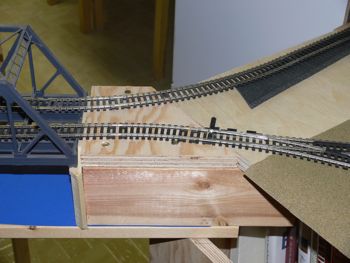
duck under in place
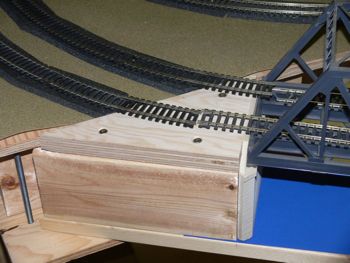 |
 |
left end |
right end |
I have just finished glueing a plastic rockwork facing (Plastruct #91592 G Scale 1/24 Dressed Stone Block) to the two end abuttments on the side that one sees as you enter the room. Books are holding the plastic to the wood while the glue sets. Watching glue set is a lot like watching grass grow. However I will be able to run the passenger train on the inner mainline so this is not a major delay. ...
A very good day. The duck-under is almost finished.
I trimmed a few areas of excess glue on the duck-under and then relaid (but did not nail down) the track over the duck-under. I also cut a piece of flat plastic to place over the wooden approaches to the two bridges on the duck-under. I need to glue this down and then paint the abuttments a light grey. But first I need to buy the light grey paint. ...
I now have the grey paint.
I have applied the last bit of cement to the duck-over assembly. This took a little longer than I first expected as the glue had to set with a pile of books on it to hold the plastic firmly against the wood.
I have applied the first coat of medium grey paint (Tamiya XF-20) to the bridge abuttments on the duck-under. I used up the entire jar and just had enough to cover everything once. The stonework looks fine but I will need to add a second coat to the smooth plastic areas. But first I must buy another jar of paint.
I drove to Model Baron this morning and bought another jar of Medium Grey paint. While in the store I also bought an October 2008 issue of Branchline magazine.
After returning home I put a second coat of paint on the Duck-Under assembly. That should finish the construction. I still need to lightly glue the bridge to the abuttments and then add the track so it is one piece ready for placement.