
Learning: The Journey of a Lifetime
Journals as an Aid to Learning
Technology
tech27 |
An Example of a "Learning Process" Journal (using the 2 colored box format) |
September
25, 2004 |
|
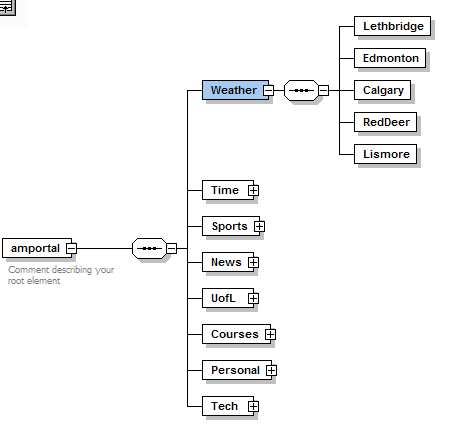
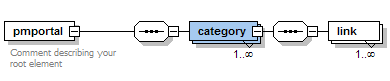
12:40 PM I have just spend a couple of hours modifying the layout for Philosophy, Psychology and Technology. The idea was to remove all links from each of these web sites to some other web site. Thus it is now possible to have a branch to these sites, but once in the site there is no way for the viewer to drill backwards to see other sites. It is a better form of security but there is still a lot of work to be done. In working on this site, I realized that I have been remiss in keeping up the routine of creating a new page each time I spend at least an hour learning something new about technology. First, I would like to describe, in my own words, the process I used to recreate an "amportal' web page using XML. The first step was to create a schema file using XMLSPY. This was relatively easy, and I quickly had a schema diagram like the following:
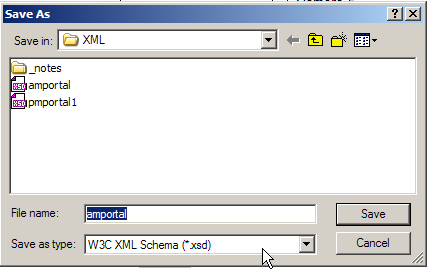
I then saved this file as a W3C Schema file (with an .xsd suffix):
The second step was to save this same file as a XML file.
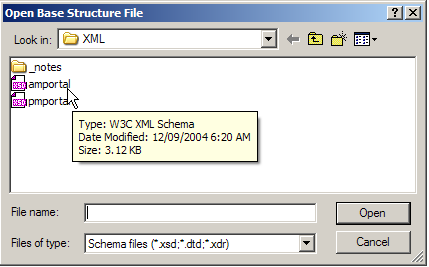
This XML file is the actual data file for this situation, although the actual data has not yet been placed in the file. There are two totally different ways to put data into the file. One method, conceptually the simplest, is to open the file and type the data into the file at the approrpriate place. However this is not a user-friendly approach and is not usually recommended. The second method is to use Altova's STYLEVISION software and essentially two different jobs at the same time. Thus the idea is to both input the data and determine how it will appear (as a webpage) with a stylesheet file. Using STYLEVISION, the important step is to specify the working XML file as the XML that was just created using XMLSPY. First, one indicates the schema file associated with the XML file:
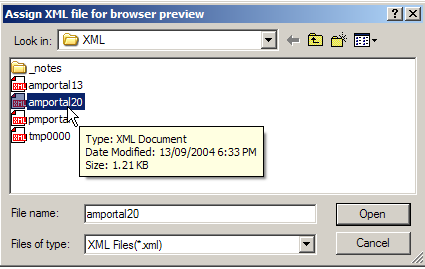
Then one specifies the working XML file (this is the data file that will receive the data).
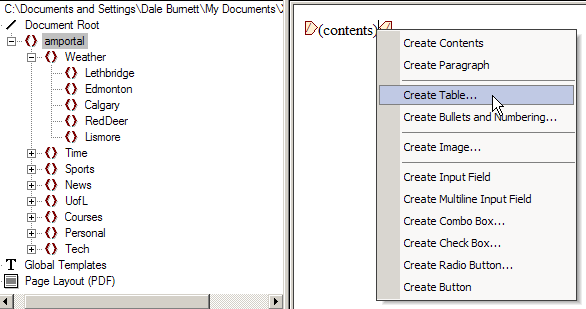
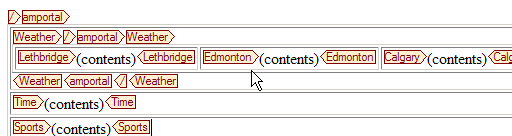
I am now ready to get to work. Drag the "amportal" element and drop it just inside the closing tag as follows. A popup menu will appear - select Create Table...
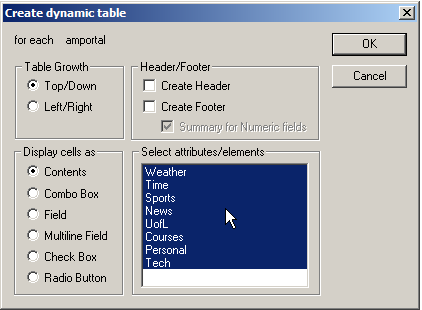
This results in the following display:
Note that the Table Growth option actually creates a vertical table that is then ready for a left/right expansion.
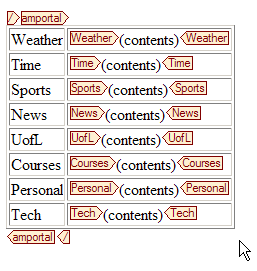
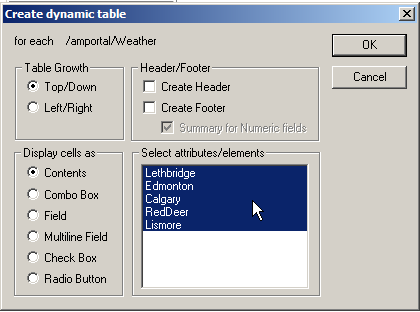
Now drag the Weather element just inside the closing tag for that name.
Create another table to obtain:
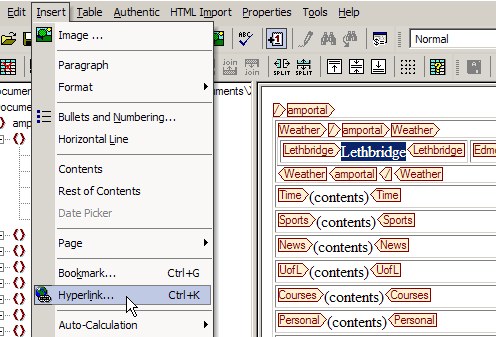
Finally select the first (contents) and type the word Lethbridge. Then select that word and go up to the Insert menu and select Hyperlink...
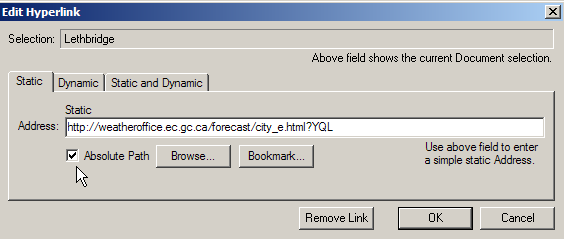
Type (or copy-and-paste) the appropriate URL:
That's it. Everything else is simply a repetition of the last few steps. When one is finished one must save three files:
|

|
I recall reading somewhere that it is important that all XML files that are interrelated should be in the same folder. This will also help me keep my files organized and may help me clarify the role of each file. |
5:30 PM While enjoying a walk in the coulee, it occurred to me that I should create a separate file folder for the XML amportal files (one each for the two different schema files). I am on the right track but am still having problems with the details. Tricky! In order to have the entire page with the same background color, I have to select the root element and then specify it as a paragraph. Then I can specify the background color. Another question that I have is whether I can change the schema after I have everything working and then have an easy change to the Stylevision design file. The answer is yes. All one does is change the schema and then open the design file in stylevision and edit the design. Of course. To get all the cells in a row the same width (say 80) then I must specify under the table properties, the width for each cell. This is really finicky! Adding a link is straight forward, but getting the proper color ( )and the cursor behavior (text menu -> More -> cursor -> hand) is detail again. I seem to have everything working, but there is still some repetitive work to be done. |
Reminder: each "Learning" session has a new web page.
Next Page |
||
E-mail: dale.burnett@uleth.ca |