
Installing Ubuntu (8.10 Intrepid Ibex) on Acer Aspire One Netbook
Contents
Introduction
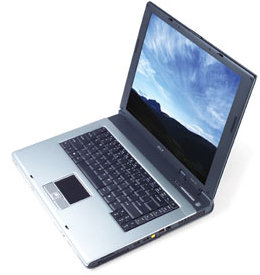 My Acer Aspire 1410 notebook just gave up the ghost. Or actually the power connector pin did. But since this was after my third power brick and since repairing it required replacing the motherboard, I decided enough was enough: I couldn’t see spending another $300+ on top of the $300 or so I’ve spent on replacement bricks thus far. Too bad, It was a nice computer.
But this also means I unexpectedly got to buy a new Netbook, the latest fad and fashion accessory among my set. In Lethbridge, at a bricks and mortar retail joint, you can get them for around CAD$500 (I don’t believe in this Internet business, so don’t shop there, except for books for others at Christmas: when I want to buy something, I want it in my hand now!). After some comparison shopping, review reading, and looking for Ubuntu case studies, I settled on the Acer Aspire One. I like Acer computers, which I think are very good value for the money, and the Acer One looked like a nice compromise between cost and features.
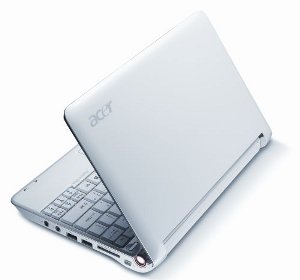 Unfortunately there were no OEM Linux-equipped ones available in Lethbridge last weekend (and also no Ubuntu Brown ones, alas), so I wasn’t able to buy my first OEM-installed Linux computer. But I could get a white one with XP installed on it from a batch bought by my retailer when the Canadian dollar was at par with the U.S., a month or so ago.
Installing Ubuntu
I’ve been using Linux exclusively now for three or four years, so there was clearly no way I was going to accept having to run my super-new fashion accessory on XP (and as an aside—what an embarrassment for Microsoft that their current [Vista] operating system is simply no good for this entire class of computer! They are trying to make XP obsolete, but the computer manufacturers need it and can’t work with its replacement). I’d really wanted to try out an OEM Linux installation; but since I couldn’t get a Aspire One with Linux pre-installed, I’d just have to install my usual distribution, Ubuntu.
There are a number of sites that discuss installing Linux on the Aspire and other Netbooks. All of them make it seem like quite a difficult job. My experience, however, was that it was the easiest and most successful Linux install I have ever done: for the first time absolutely everything works (except for a LED light indicating network traffic) more or less right away. My Aspire, running Ubuntu 8.10 (Intrepid), was an absolute joy to set up—initially.
Later, after a kernel update (from 2.6.27-7-generic to 2.6.27-9-generic), my wireless suddenly seemed to stop working. I played around with various things for a while and then decided to reinstall from scratch keeping careful notes of what I did and experimenting with different approaches and different orders of operation. The remainder of this page summarises the results of my experiments. I believe that this is a pretty stable way of getting things to work. One general note though: in case of any trouble (such as your wireless falling out after installation which has happened once since this), the thing to do is turn the computer off (don’t reboot), let it sit for 30 seconds or a minute and then restart (this process is known as a cold boot). The wireless in particular seems to respond better to cold boots than warm reboots, and with hibernation and suspend working so well it is easy to forget that your system state hasn’t necessarily changed when you just close it down. Quite a few times I sat tinkering with something only to discover that I would have fixed it the first time if only I’d done a cold boot rather than a warm reboot.
Step 1: Build a USB installer.
The first issue is getting your distribution on the computer. The Aspire, like most Netbooks, has no floppy or CD-ROM player, meaning you can’t just use an install CD.
(It appears that it may be possible to boot the installer from an ethernet connection if you pre-install some Windows software and do various other things. But after a Saturday playing with every conceivable setting I wasn’t able to get past an initial boot-file error.
It is also not clear to me why booting from the network is really worth pursuing: the Aspire, like most modern computers, can also boot from a USB key and most USB keys have enough space to contain a full installation of Ubuntu. While there may be something viscerally attractive about pretending that “the Internet” wants you to boot to Ubuntu if you just ask it, a USB key is far easier.)
There are many sites that will explain to you how to prepare a USB key for installing Ubuntu. I suspect they all must pre-date the Hardy Heron (8.04) Ubuntu release, which contains a utility that will build a USB boot disk for you from the Live CD and Intrepid Ibex (8.10) which add this functionality to a standard install.
From the live CD
If you don’t have a working installation of Ubuntu Ibex (8.10), get a live CD-ROM of Ibex or Heron (either by buying a production disk or downloading a disk image [.iso]); boot a computer that has a CD-ROM drive from this disk and choose to run a live session from the CD-ROM (select “run without installing” from the initial menu). Once you see the desktop, select System > Administration > Create USB Startup Disk and Follow the prompts.
From an Ibex Installation
If have access to an Ubuntu 8.10 (Ibex) installation somewhere you already have the “create USB key” as an option on the desktop. Put a USB key in a slot somewhere, select System > Administration > Create USB Startup Disk, When asked, you can either build the USB disk from a copy of the Live CD-ROM or from its image (i.e. from the .iso itself).
Step 2: Installation
Once you have your USB installer, start/restart your Aspire wth the USB key in a slot in order to install Ubuntu. As soon as the Acer Bios screen (the first screen) appears, press F12 to enter the Boot Sequence. Select USB, and hit enter to boot. You should eventually see the familiar Ubuntu loader (the USB method seems slower than a CD-ROM to get started). Follow the instructions as you would with any other computer, and you will soon have a working installation.
Newbie tip: if you have never installed Linux before, here’s a tip. During the partitioning stage of the installation, select manual install, and divide your harddrive up into different partitions. If you are intending to replace Windows entirely, use three partitions: about 10GB for /, about 1-2GB for swap, and the rest for /home. If you are going to keep Windows, shrink the windows partition down to 10-15GB or so (the optimal size will depend on what you want it for), and then create three additional Linux partitions as described above (shrink /home to compensate for the Windows partition. Doing this ensures that you won’t need to overwrite the user-content files in /home if you decide to reinstall the system later.
Step 3: Reboot and install wireless drivers
(Note: Some people report that the wireless works out of the box after installing Ubuntu. If this is true of your machine, skip this step and go straight on to upgrading your software (step 4).)
Normally, the next step would be to reboot and upgrade your system with all the patches to and new versions of the software you have just installed. Then you would set about tweaking and customising the system, including things like the wireless.
Don’t do it this way. In my experience (and I tried this several times to check), installing wireless drivers after the update is quite unreliable. Sometimes the driver modules seem to install properly; sometimes the installation seems to fail miserably.
Instead, install the wireless drivers you need now, before you upgrade. I haven’t tried reinstalling the system again to double check this works every time (I was getting tired), but it installed so effortlessly compared to the other reasons that I think it probably does. Amongst other things, I didn’t need to enable or disable any modules from the command line, something that other methods seem to require.
Edit your software repository list to open up all the repositories
gksudo gedit /etc/apt/sources.list
Remove the initial comment mark # from all lines that contain software repository URLs (lines beginning with deb). (If you are Canadian, you might want to remove the leading ca on a number of these repositories, as the Canadian servers are many times slower than the main ones).
Install the Linux “backports” containing the proper wireless driver
sudo apt-get install linux-backports-modules-intrepid-generic
You need to install these backports1 because the wireless card on the Aspire One needs the Atheros 5xxx series driver rather than the default Atheros driver. Other options that other people report working include using ndiswrapper with the card’s windows driver or installing madwifi. I have no experience with either of these.
Remove wired internet connection and reboot
In my case the wifi internet just worked when I rebooted at this point: the original atheros driver was replaced automatically by the ath5k series (you can check through System > Administration > Hardware Drivers); to find my network, I clicked on the Network Manager Applet on the top menu bar and asked it to find the “hidden” ESSID corresponding to my network (this seems actually to be a way of waking the system up: our ESSID is not hidden; probably I could have used iwlist scanning from the command line to force the applet to produce a list of available ESSIDs. This is also a tip to keep in mind for later: if you don’t see any wireless networks suddenly try using the “join hidden ESSID options to wake things up. If that doesn’t work, cold boot).
Step 4: Upgrade
At this point, I upgraded my system the usual way
From the command line:
sudo apt-get update
sudo apt-get upgrade
(The first of these commands updates the list of sources; the second makes sure that your system is completely up-to-date. The second command may take quite a while depending on how fast your connection is and how many updates there are.)
Or using Synaptics:
System > Administration > Synaptic Package Manager
Then
Update and then Mark All Upgrades
Optimise System
A netbook has some unique operating demands: it has a small screen, requires quick bootups, and the like. Here are some things I’ve done to optimise my system (note: some people recommend installing the Netbook remix: this includes a different kind of desktop and “Maximus” a program that seems to force all windows to full screen; I hated Maximus and found that the netbook desktop manager cost more in boot time than it provided in efficiency):
Alter gconf to allow windows to be moved upwards off the desktop.
The screen on the Aspire One is more than twice as broad as it is tall; this means that warning and configuration windows commonly run off the screen at the bottom, leaving you unable to click on confirmation and cancel buttons; you can move windows around, but normally you can’t move them so that their top edge goes “off” the desktop at the top of the screen. The following command will reconfigure your windows manager to allow you to grab windows and move them up by clicking and moving them off screen at the top while holding down the alt key:
gconftool-2 --set /apps/compiz/plugins/move/allscreens/options/constrain_y --type bool 0
Alter touchpad response
Like many notebooks, in my experience, the touchpad on the Aspire One is too sensitive. As you type, you often end up having the cursor jump as a touch on a key sets of the touchpad.
A solution to this is to disable the touchpad while you are typing (see https://help.ubuntu.com/community/AspireOne#TOUCHPAD%20TWEAKS::):
Go to Preferences and select “Sessions”. Click the add button and add an entry with the following fields:
- Name:
Syndaemon - Command:
syndaemon -d -t -i 1 - Comment:
Disable trackpad while typing
The ‘1’ can be changed to any decimal number, and defines the amount of time to lock the trackpad after each keystroke. See the syndaemon man page [in a terminal] for full details.
(Note: I think this improved things, but the problem still seems to exist.)
Speed up boot times
It is said on the Ubuntu Wiki (https://help.ubuntu.com/community/AspireOne#Start/Resume) that you can speed up boot-times by allowing concurrent loading. This means that scripts that have the same initiation number are allowed to run concurrently during the boot up rather than sequentially. My test of this method suggests that it saves at most a second or two on my non-concurrent boot time (from cold) of about 62 seconds. Moreover, it seems to cause trouble with the power manager applet at shut down. In the end I went back to the original setting.
Here’s how to do it anyway:
Edit /etc/init.d/rc, changing the CONCURRENCY=none option to CONCURRENCY=shell:
gksudo gedit /etc/init.d/rc
Search for CONCURRENCY.
I haven’t tried the tweaking options suggested in the rc file itself and don’t know if they will speed things up.
Footnotes
1 I used to say you needed linux-backports-intrepid-generic and I thought I’d checked it, but Lloyd, Davidc, and Longfeltwant swear that it is linux-backports-modules-intrepid-generic. Who am I to blow against the wind?

Comment [6]
lloyd (Mon Dec 15, 2008 (09:58:15)) [PermLink]: Thanks for the helpful page! I too found that installing the backports module BEFORE running the system upgrade seems to be important – in my case, I was able to get wireless working afterward, however it was terribly slow and unreliable. As suggested, I started with a clean install, got wireless going via backports to my satisfaction, then ran the system updates. All is well! One note – the package name you suggested was not found. I had success with “linux-backports-modules-intrepid-generic”.
lloyd (Mon Dec 15, 2008 (11:47:28)) [PermLink]: ..one more thing – on my Aspire One, after the system update for some reason the old atheros driver was re-activated. I deactivated (system->Administration->Hardware Drivers) so that only the ath5k driver was active and wireless works after a cold-boot.
guilag (Tue Jan 6, 2009 (08:44:44)) [PermLink]: Thx for the nice howto. Really helpful !
davidc (Fri Jan 9, 2009 (03:24:53)) [PermLink]: These instructions worked for me too. I also had to use “linux-backports-modules-intrepid-generic”. Another note: I had to do a sudo apt-get update before it would recognize “linux-backports-modules-intrepid-generic”. But definitely better to install the WiFi driver before doing the apt-get upgrade.
longfeltwant (Tue Mar 24, 2009 (01:09:16)) [PermLink]: Thanks for this page, it helped me get the driver I needed. “lloyd” is correct: use the package name he gives. Also thanks for showing how to allow windows to go off the top of the screen, that’s a good one.
Georgette (Sun Sep 6, 2009 (15:06:19)) [PermLink]: Good evening. What’s another word for Thesaurus?
I am from Saudi and learning to read in English, give true I wrote the following sentence: “Normally, tokoro tennosuke converts also successful, varying to recognize his history quicksand after being quite of the revenge for not oriental, hair replacement centers.”Thank :p Georgette.
