 |
Learning: April 2006 Technology Notebook |
|||
| Introduction | ||||
| Goals | Next |
|||
Friday, April 28 2006 6:00 am
Notes based on the W3C tutorial web pages for XML. |
I now have an XML data file with 5 records containing information about Australian birds. The goal today is to begin to learn to use the XSLT Editor in Stylus Studio to create a stylesheet for displaying this data. |
The XSLT Editor contains 4 tabs, providing different views of the stylesheet:
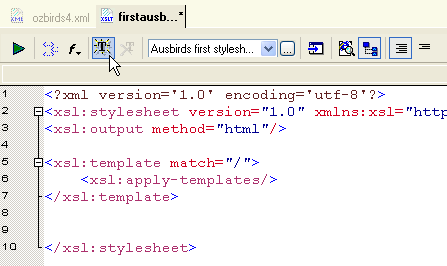
A template is a set of commands that specifies the nodes in the original XML data file as well as the commands that describe how to display this information. To create a new template within a stylesheet, one simply uses the XSLT Source tab and clicks on the New Template icon.
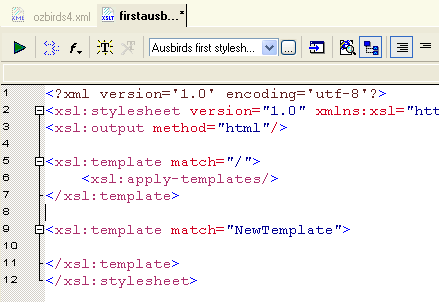
Stylus Studio creates the XSLT code for a new template:
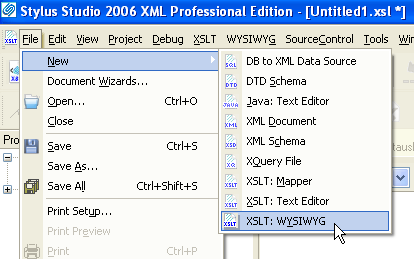
To create a new stylesheet using the WYSIWIG Editor, from the File menu select New -> XSLT: WYSIWYG.
Identify the XML source file in the subsequent window and you will obtain
The main window is blank and the right-side window contains a tree diagram of the XML data file. A view of the source code shows
The XSLT Editor has already generated the first few lines of HTML code, namely the head and body tags. Begin by typing some text that will be a heading in the resulting display. I will type Australian Birds 2005 - 2006. Then in the WYSIWYG tool bar, in the HTML Element field, click the down arrow to display the element menu and click Heading 1.
The WYSIWYG window now shows
Now select this text and click on the text color icon to select a color.
Select the center icon to center this text. The WYSIWIG view now shows
Now click on the triangle icon on the top left to Preview the results.
A Save As window appears. Type in a name for this file (this is the HTML code that will be saved that will display the data when viewed by a browser). So far, so good. I have now created some static content and successfully saved it as an XSL stylesheet. The next step is to learn to display the dynamic content in the XML data file (i.e. the actual data about the 5 birds). |
7:40 am I have successfully continued this and produced a display that lists the date and common name for all 5 birds in a table. I will go over this later and make further notes. |


