DEM2TOPO generates elevation contours from CDED or GeoTIFF (written by 3DEM) data, and writes them to an ESRI shapefile or Polish Format .mp file with the same file prefix as the input file. In order to upload the contour vectors to a Garmin GPS, you must open the .mp file or import the ESRI shapes into a program such as GPSMapEdit. GPSMapEdit can export Garmin .img files with the use of cGPSMapper. The resulting .img files can then be uploaded to a GPS with SendMap (included in the cGPSMapper package). The steps in this process are outlined below:
DEM2TOPO reads CDED Canadian digital elevation files directly, or GEOTiff files coverted from other sources. CDED files that are compatible with DEM2TOPO are available from GeoGratis.gc.ca, or directly via FTP from ftp://ftp2.cits.rncan.gc.ca/pub/cdem.
Note that the Datum is NAD83 for Canadian maps.
If you have installed the IDL Virtual Machine, you can start DEM2TOPO by double-clicking the dem2topo.sav file. The dem2topo.var file must be in the same directory as the .sav program. If you want to revert to the default settings, just delete the .var file, and select cancel when DEM2TOPO asks you for the location of the file.
Alternatively, if you downloaded the RT version, you can start DEM2TOPO by running the dem2topo.exe file.
You should see an IDL splash screen if the program loads properly. Select 'continue', and you should see the DEM2TOPO main screen:
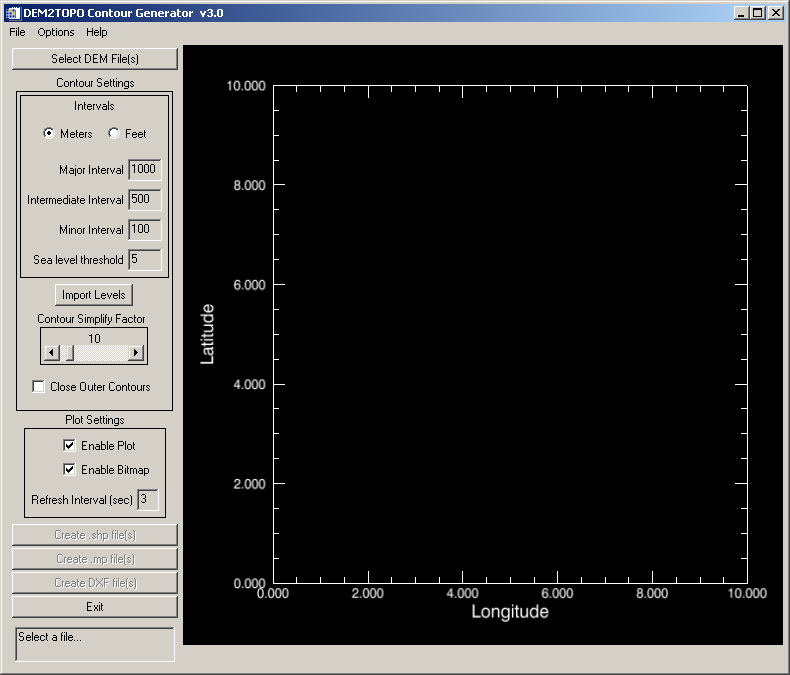
Select the files that you downloaded by clicking the 'Select DEM Files' button. DEM files must have a '.dem' extension, whereas GeoTIFF files from 3DEM must have a '.tif' extension. If the 'Enable Bitmap' button is selected, bitmaps of the DEM files will be shown. The color table for the elevation mapping can be changed using the options menu.
Select contour spacing for minor, intermediate, and major contour levels. Enter a value of -1 to skip the level. The CDED files have 1m vertical resolution (accuracy is another matter), but note that contour spacing less than 10m (50m in mountainous regions) can result in very large files and long processing times. Metric spacing is the default, but imperial units can also be used.
You can also import a list of irregularly spaced contour levels by selecting the 'Import Levels' button. The imported file must be an ASCII CSV (comma-separated-values) file with 2 columns. The first column must be an integer indicating whether the contour is major (1), intermediate (2), or minor (3). The second column can be an integer or floating point number specifying the elevation of the contour. For example, the following file will create 2 minor contours, and 1 major contour:
3,1005
3,1010
1,1000
After importing a CSV file, the contour spacing entry fields will contain -2, indicating that the contour levels are defined by a file.
If you are contouring an area with large areas of water, select a sea level threshold value that will force DEM2TOPO to ignore all areas beloe this elevation. Be careful about setting this value too high, as it may cut out areas of coastline. When using the USGS color table, areas with elevation less than the threshold will be shown as blue in the bitmap preview.
Select the simplification factor using the slider. 10 is a good default value. 100 will result in dramatically smaller files, but with reduced contour fidelity. Small closed contours suffer the most degredation from high simplification factors. Set to 0 to disable the simplification process. This will result in files ~ 10x larger than normal, but may save time.
If you want all contours to be closed polygons, select the 'Close Outer Contours' checkbox. For maps that will be tiled, you will generally want to leave this box unselected.
Select the plot refresh interval. 3 seconds is good for normal files. For very large topos, such as SRTM files, setting the refresh rate to 30 minutes or longer may save time overall. Alternatively, disable the plotting altogether using the checkbox for maximum processing speed.
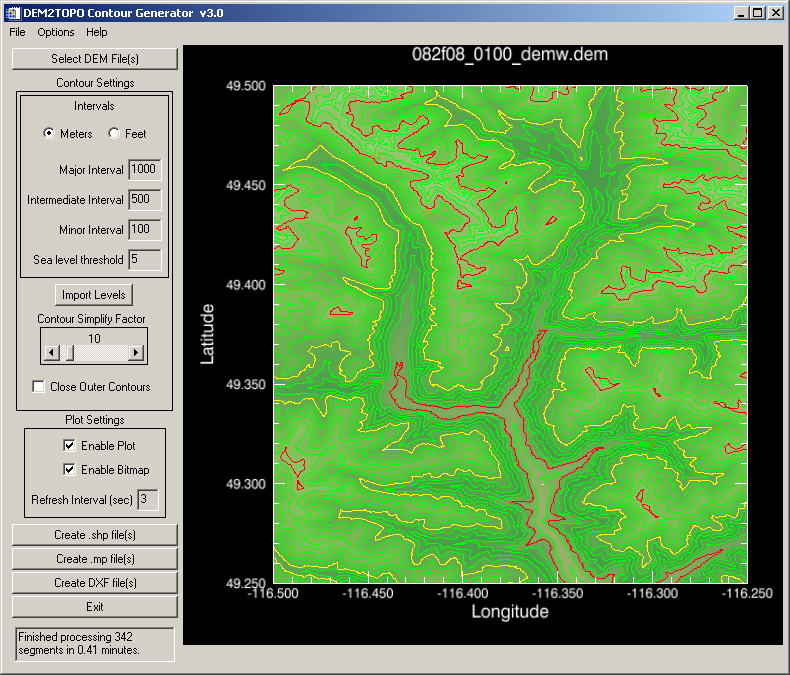
You can generate .mp files directly in DEM2TOPO by clicking the 'Create .mp file(s)' button. Contours will be drawn during the contour generation process. Major contours are red, intermediate are yellow, and minor are green. Note that this is just a preview of the contours, the output files have no color or thickness associated with them. Be patient, high-resolution files can take some time to generate. A dialog box will pop up indicating when the processing is finished and the .mp files are ready for use. The .mp files will have the same file prefix as the input CDED files.
To abort the processing of the file, hit 'Q' during the contour generation.
The .mp files can be edited in GPSMapEdit, for example, and exported for use in OziExplorer for printing, tracking, etc.
Once you have selected the files, and set up the contour spacings you want, hit the 'Create .shp file(s)' button. The process is the same as the .mp file generation described above. The ESRI files will have the same file prefix as the input CDED files.
To abort the processing of the file, hit 'Q' during the contour generation.
Once you have selected the files, and set up the contour spacings you want, hit the 'Create DXF file(s)' button. The process is the same as the .mp file generation described above. The DXF files will have the same file prefix as the input CDED files, and will contain polylines for the contours. The X and Y coordinates will be in degrees, whereas the Z coordinate will be in metres.
To abort the processing of the file, hit 'Q' during the contour generation.
Start GPSMapEdit and create a new map. I assume that you have a working knowledge of the
GPSMapEdit program. If you do not, see the documentation for that program. Set up map levels
in GPSMapEdit as follows:
level 0 -> 1.2K
level 1 -> 1.2-3K
level 2 -> 3-8K
level 3 -> 8-12K
Import the new ESRI shapefile(s) using the object code for the type, and object labels for the labels. Note: Import only level 0.
Note: The ESRI shapefiles use elevation in feet for compatibility with GPSMapEdit, which uses feet by default when it imports contours from .shp files. After you have imported a .shp file using the 'code' field to determine the type of object to import, and the 'Elevation' field for the labels, you can then select units of feet or metres within GPSMapEdit and the elevations will be converted properly. If you do not import the shapefile objects as contours (type codes 0x0020 - 0x0025) then the elevations will be converted to normal labels, and GPSMapEdit will not be able to change the units properly.
Now set up the levels, so that the minor contours extend to level 0, the intermediate contours extend to level 1, and the major contours extend to level 2. You may want to adjust the zoom levels so that the contours are displayed appropriately in your GPS.
Change cGPSmapper options: TRE size=500, Max points per obj=250. This will help speed up display in the GPS. You may need to adjust these settings depending on your map.
Save the map as a polish format .mp file
DEM2TOPO supports printing, but the plot style is not configurable. Countour labels are not currently printed in DEM2TOPO. You will probably get better results if you print the .mp or .esri files from other software. For example, GPSMapEdit can export bitmap files of arbitrary resolution for use in Oziexplorer or for printing.
Open the .mp file generated from DEM2TOPO, or by the steps above, and export to a .img file
Upload to GPS using SendMap or equivalent